
Our platform comes with powerful embed options that allow you to place registration forms and popups directly onto your own custom pages or websites rather than using our built-in registration forms. In this tutorial, we'll cover how webinar registration popup widgets specifically.
The registration popup widget can be great if you want to link people to your home page where the focus isn't necessarily your webinar, but still give them the option to register for your events. For example, if you wanted to bring people to your software sales page and have a webinar widget in the corner inviting them to a demo, this can be a great option.
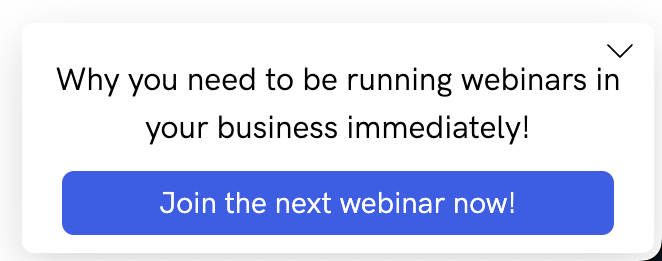
The widget will look similar to this (but can be customized to your liking):
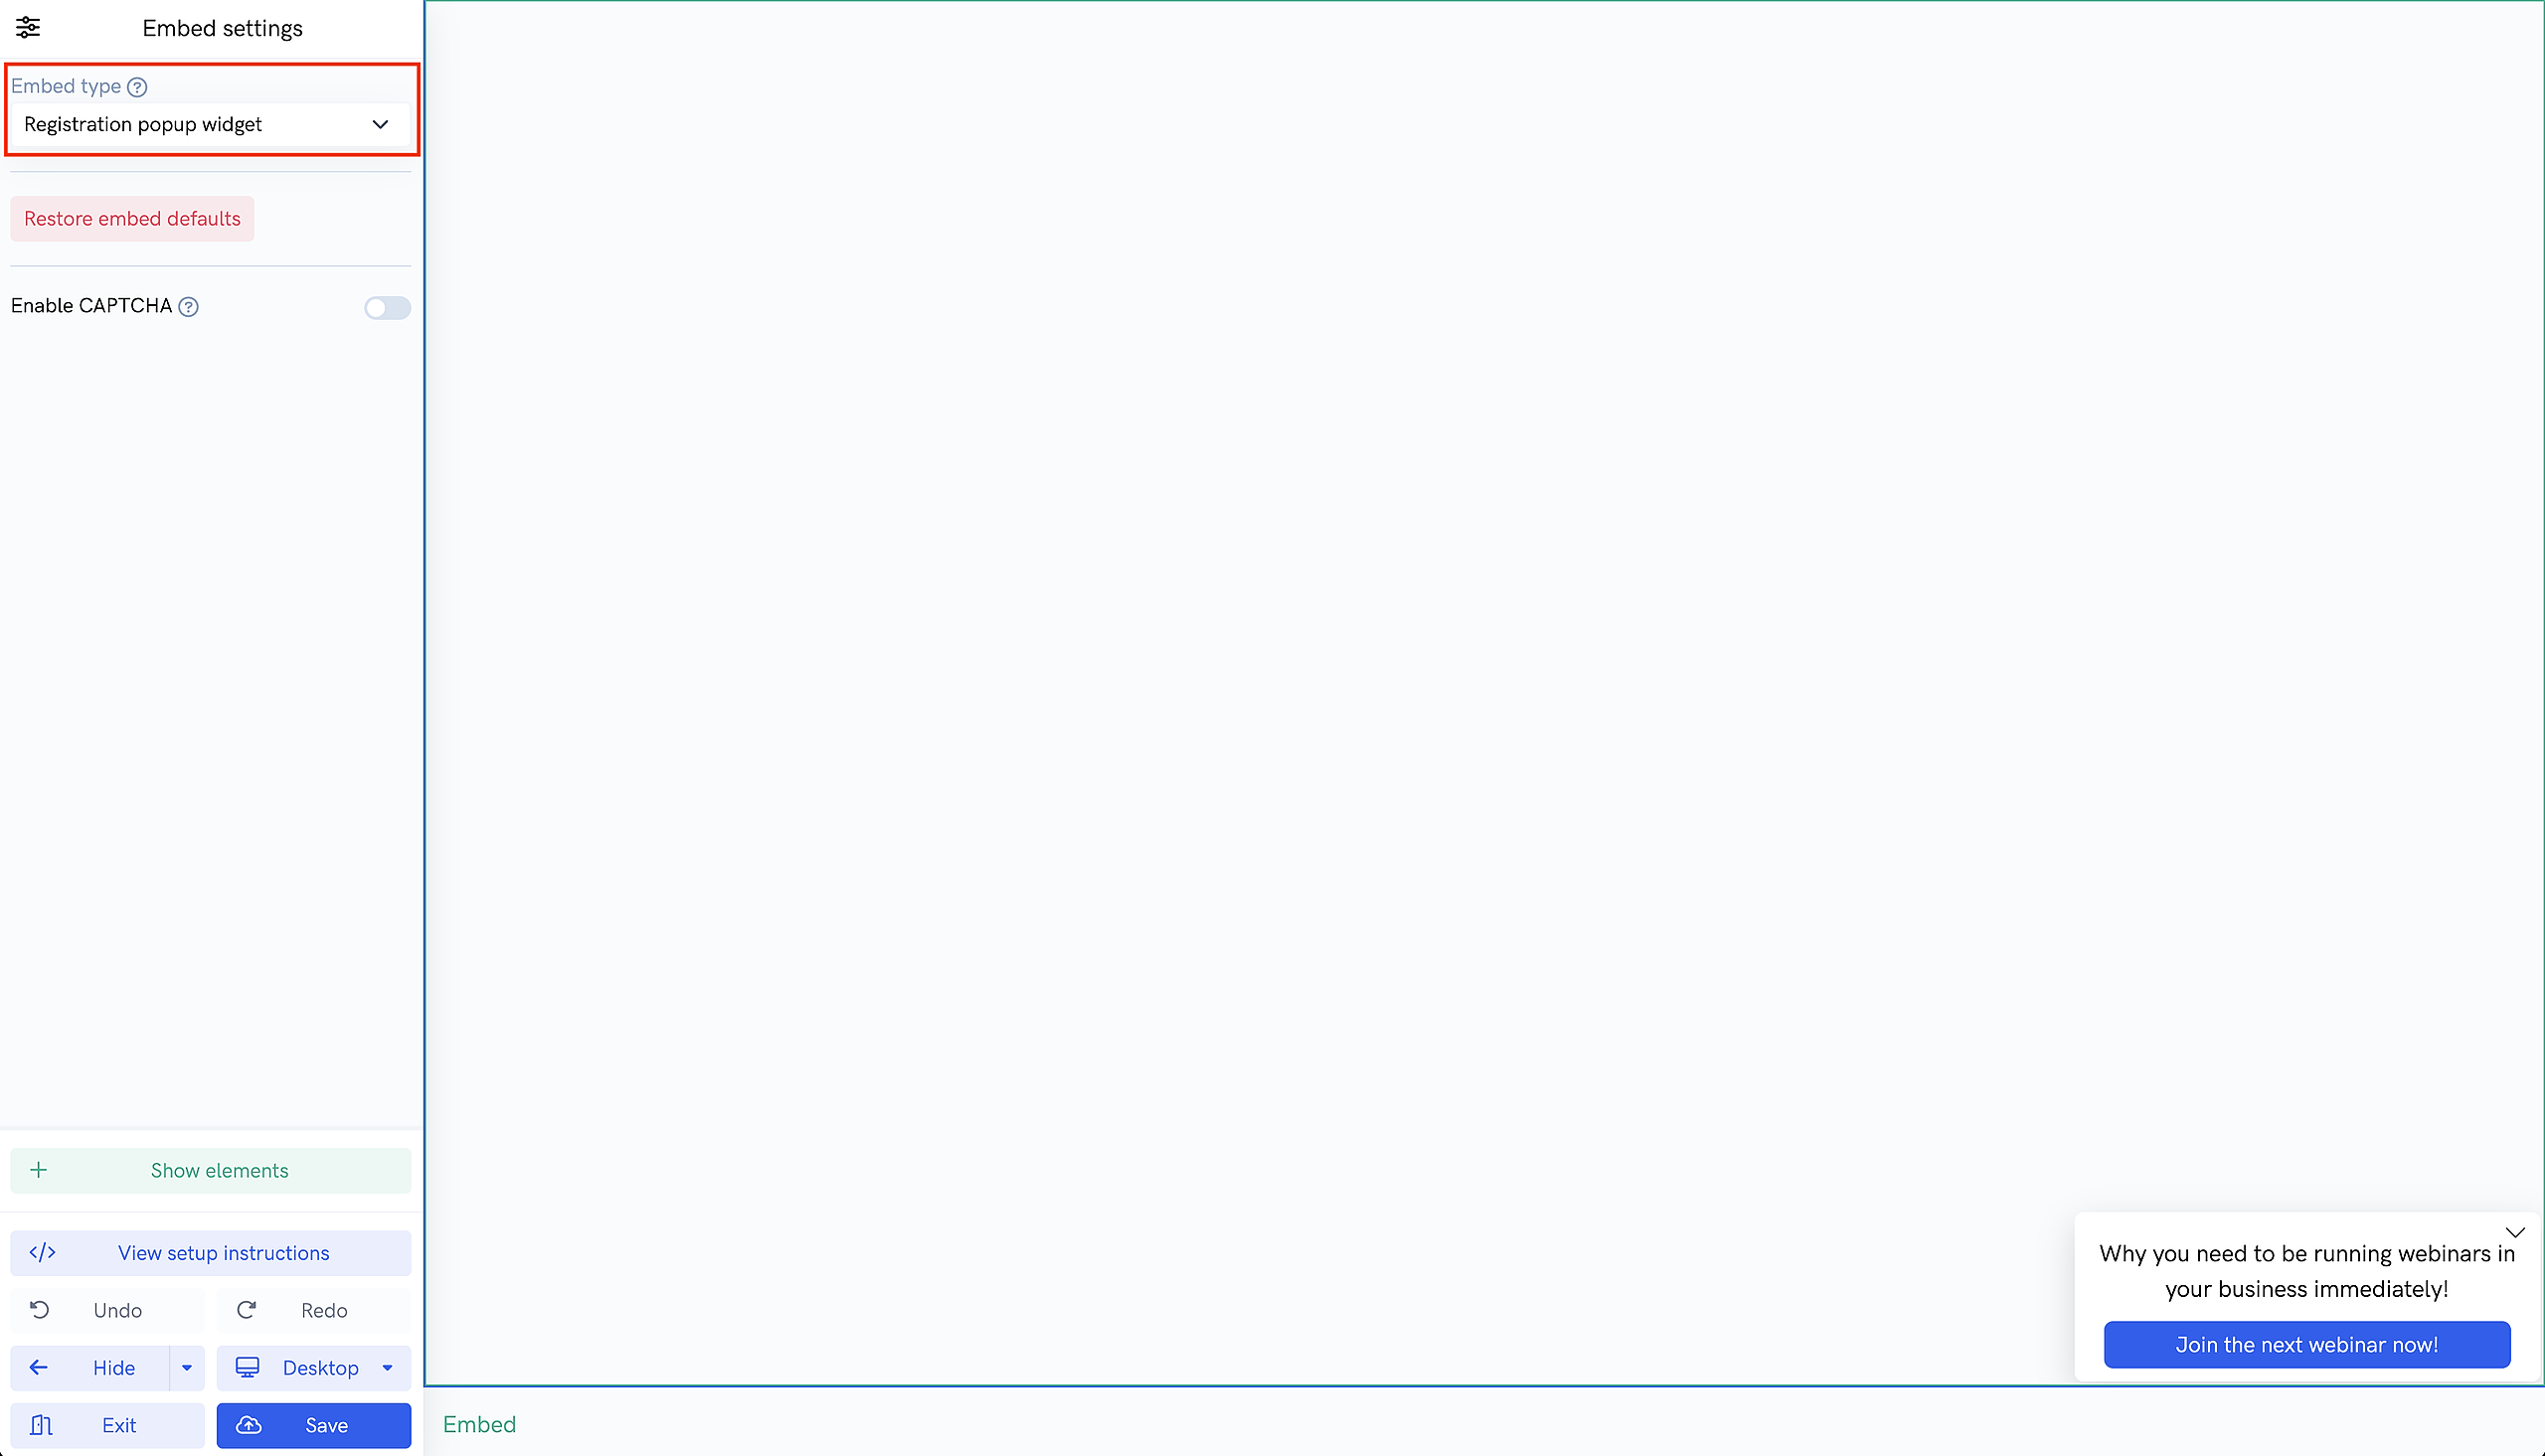
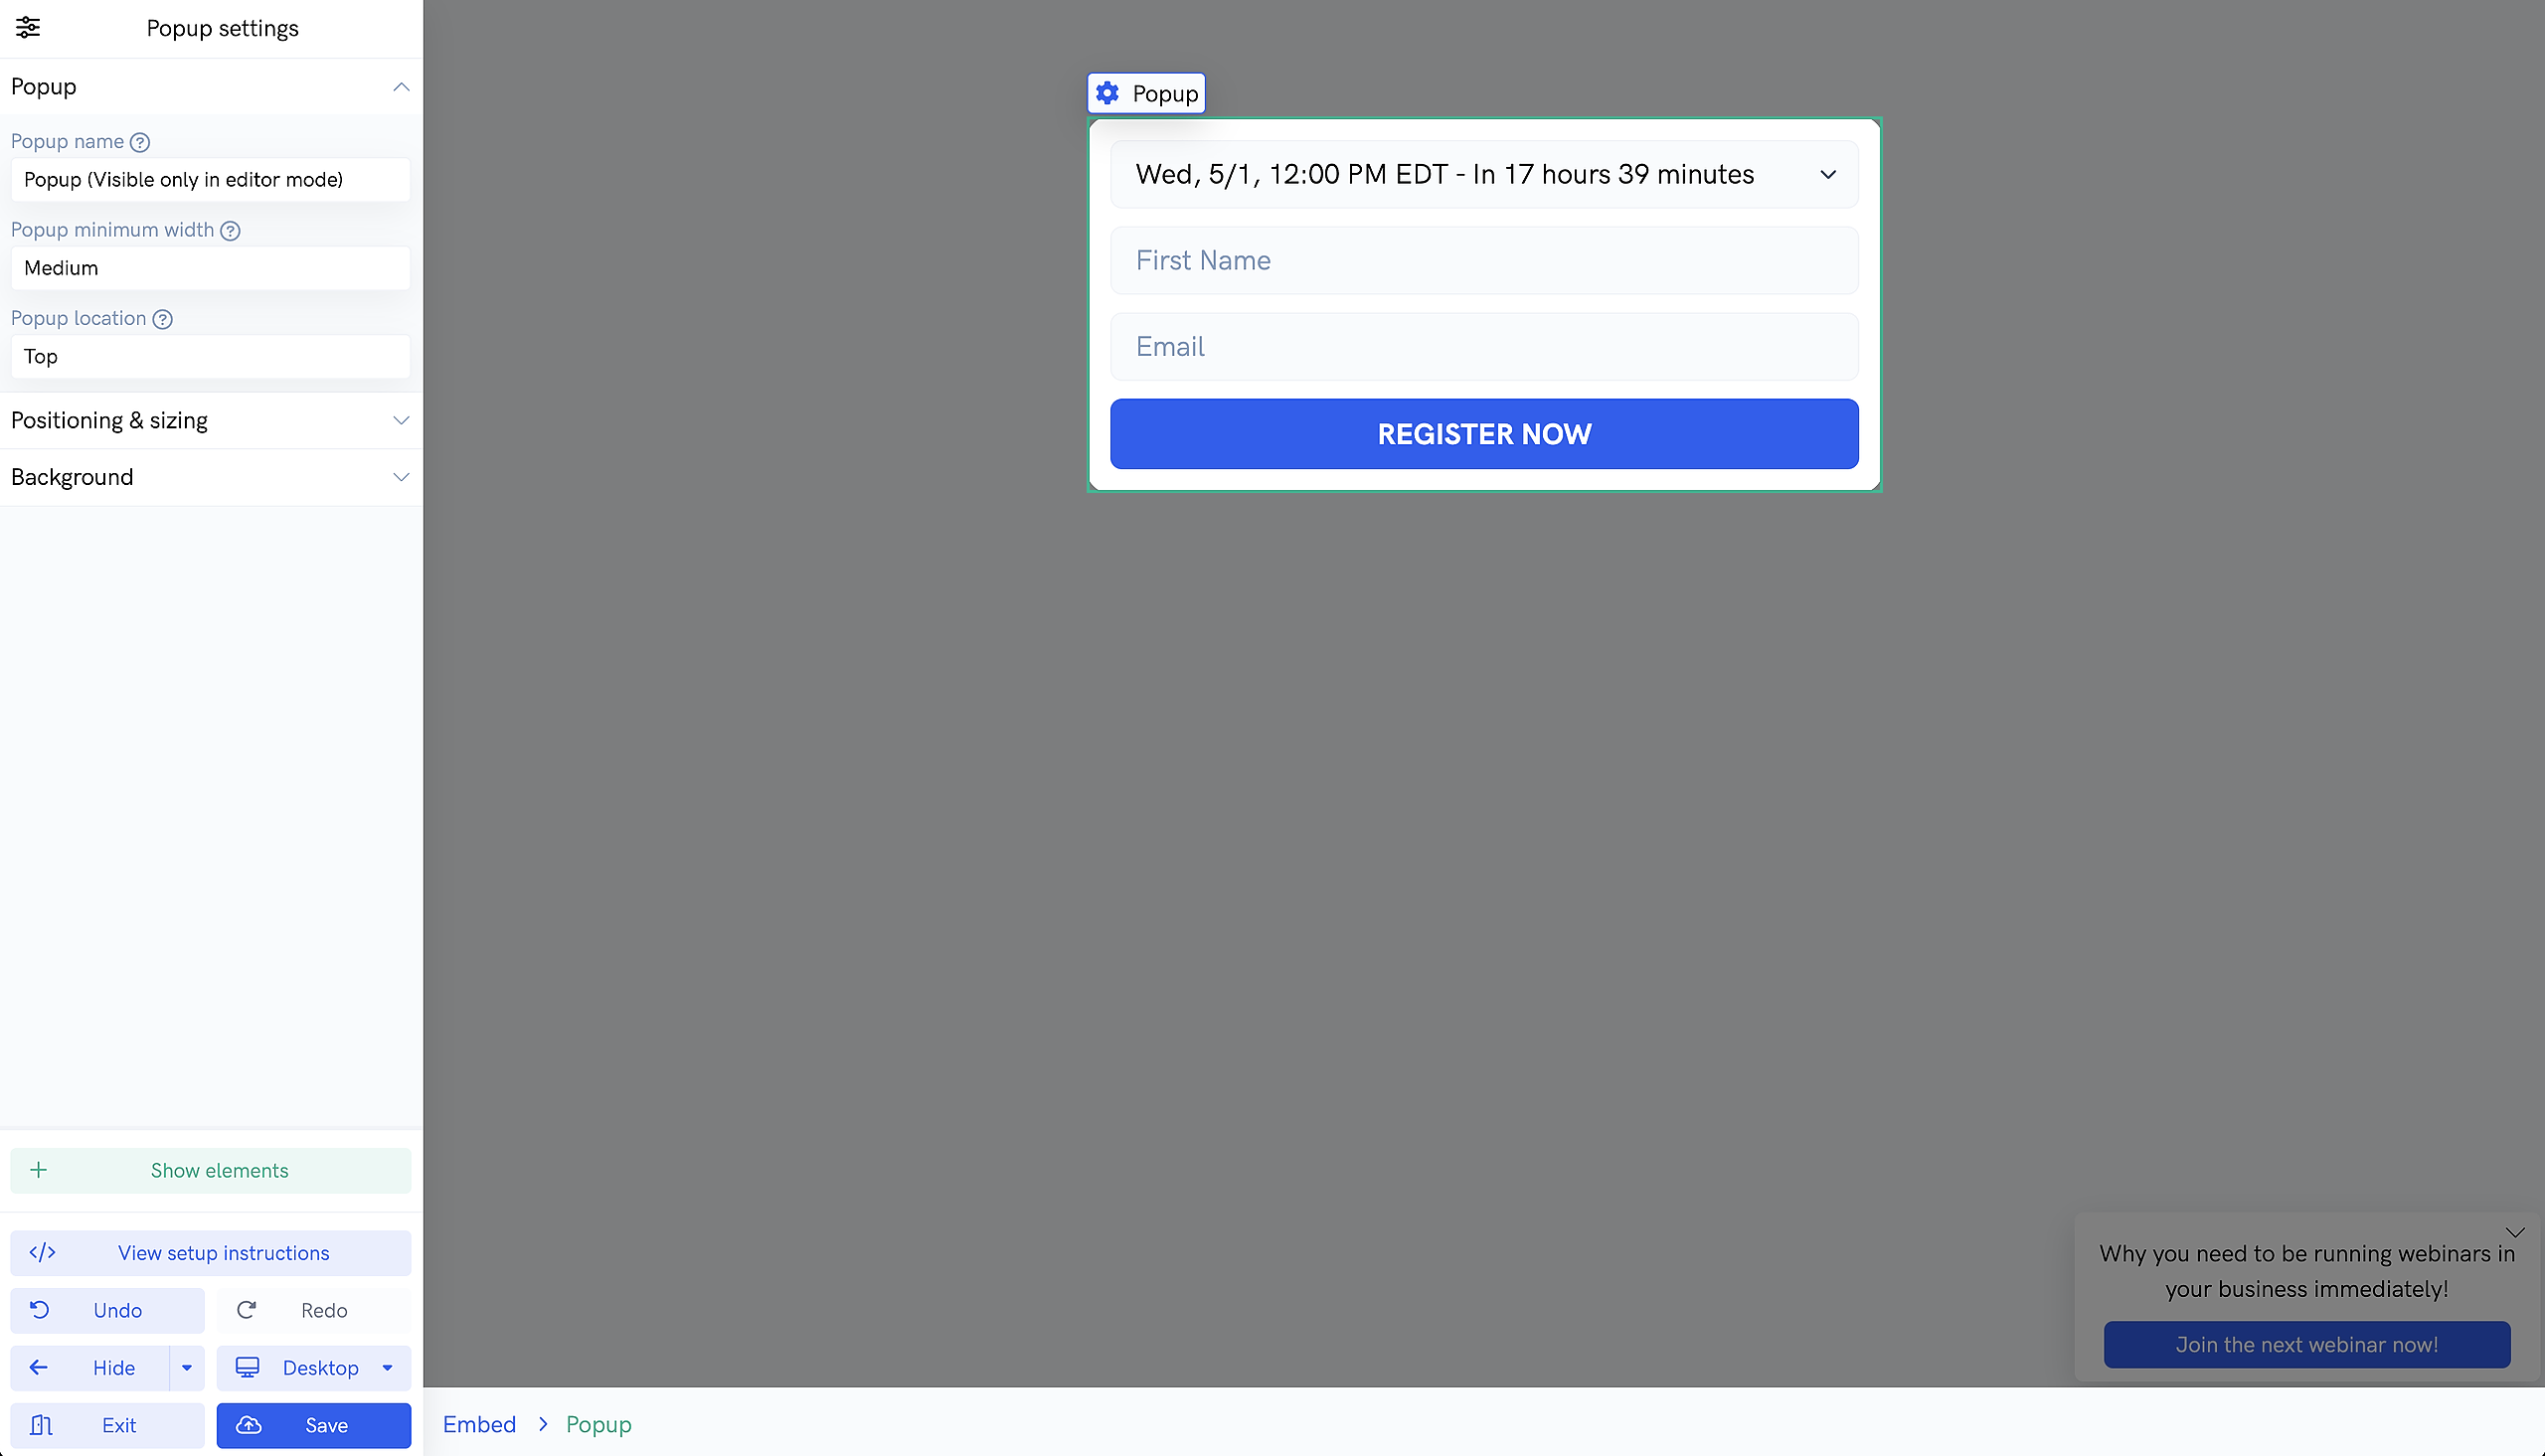
And when the button is clicked, a popup like this will appear:

To embed the registration popup widget into your own page or site, head to the "Register" settings page of your webinar, click the toggle so that option to embed into your own site is selected, then open the embed builder. Inside the embed builder, select "Registration popup widget" from the "Embed type" dropdown.
From here, you can customize the popup widget by adding elements like text, images, or even video, adjust widget position, change colors, and more.
You can also customize the popup element by clicking the "action" icon on the widget button.
Once you're done customizing the widget to your liking, click the "View setup instructions" to get the script snippets that you need to paste into your page or site.
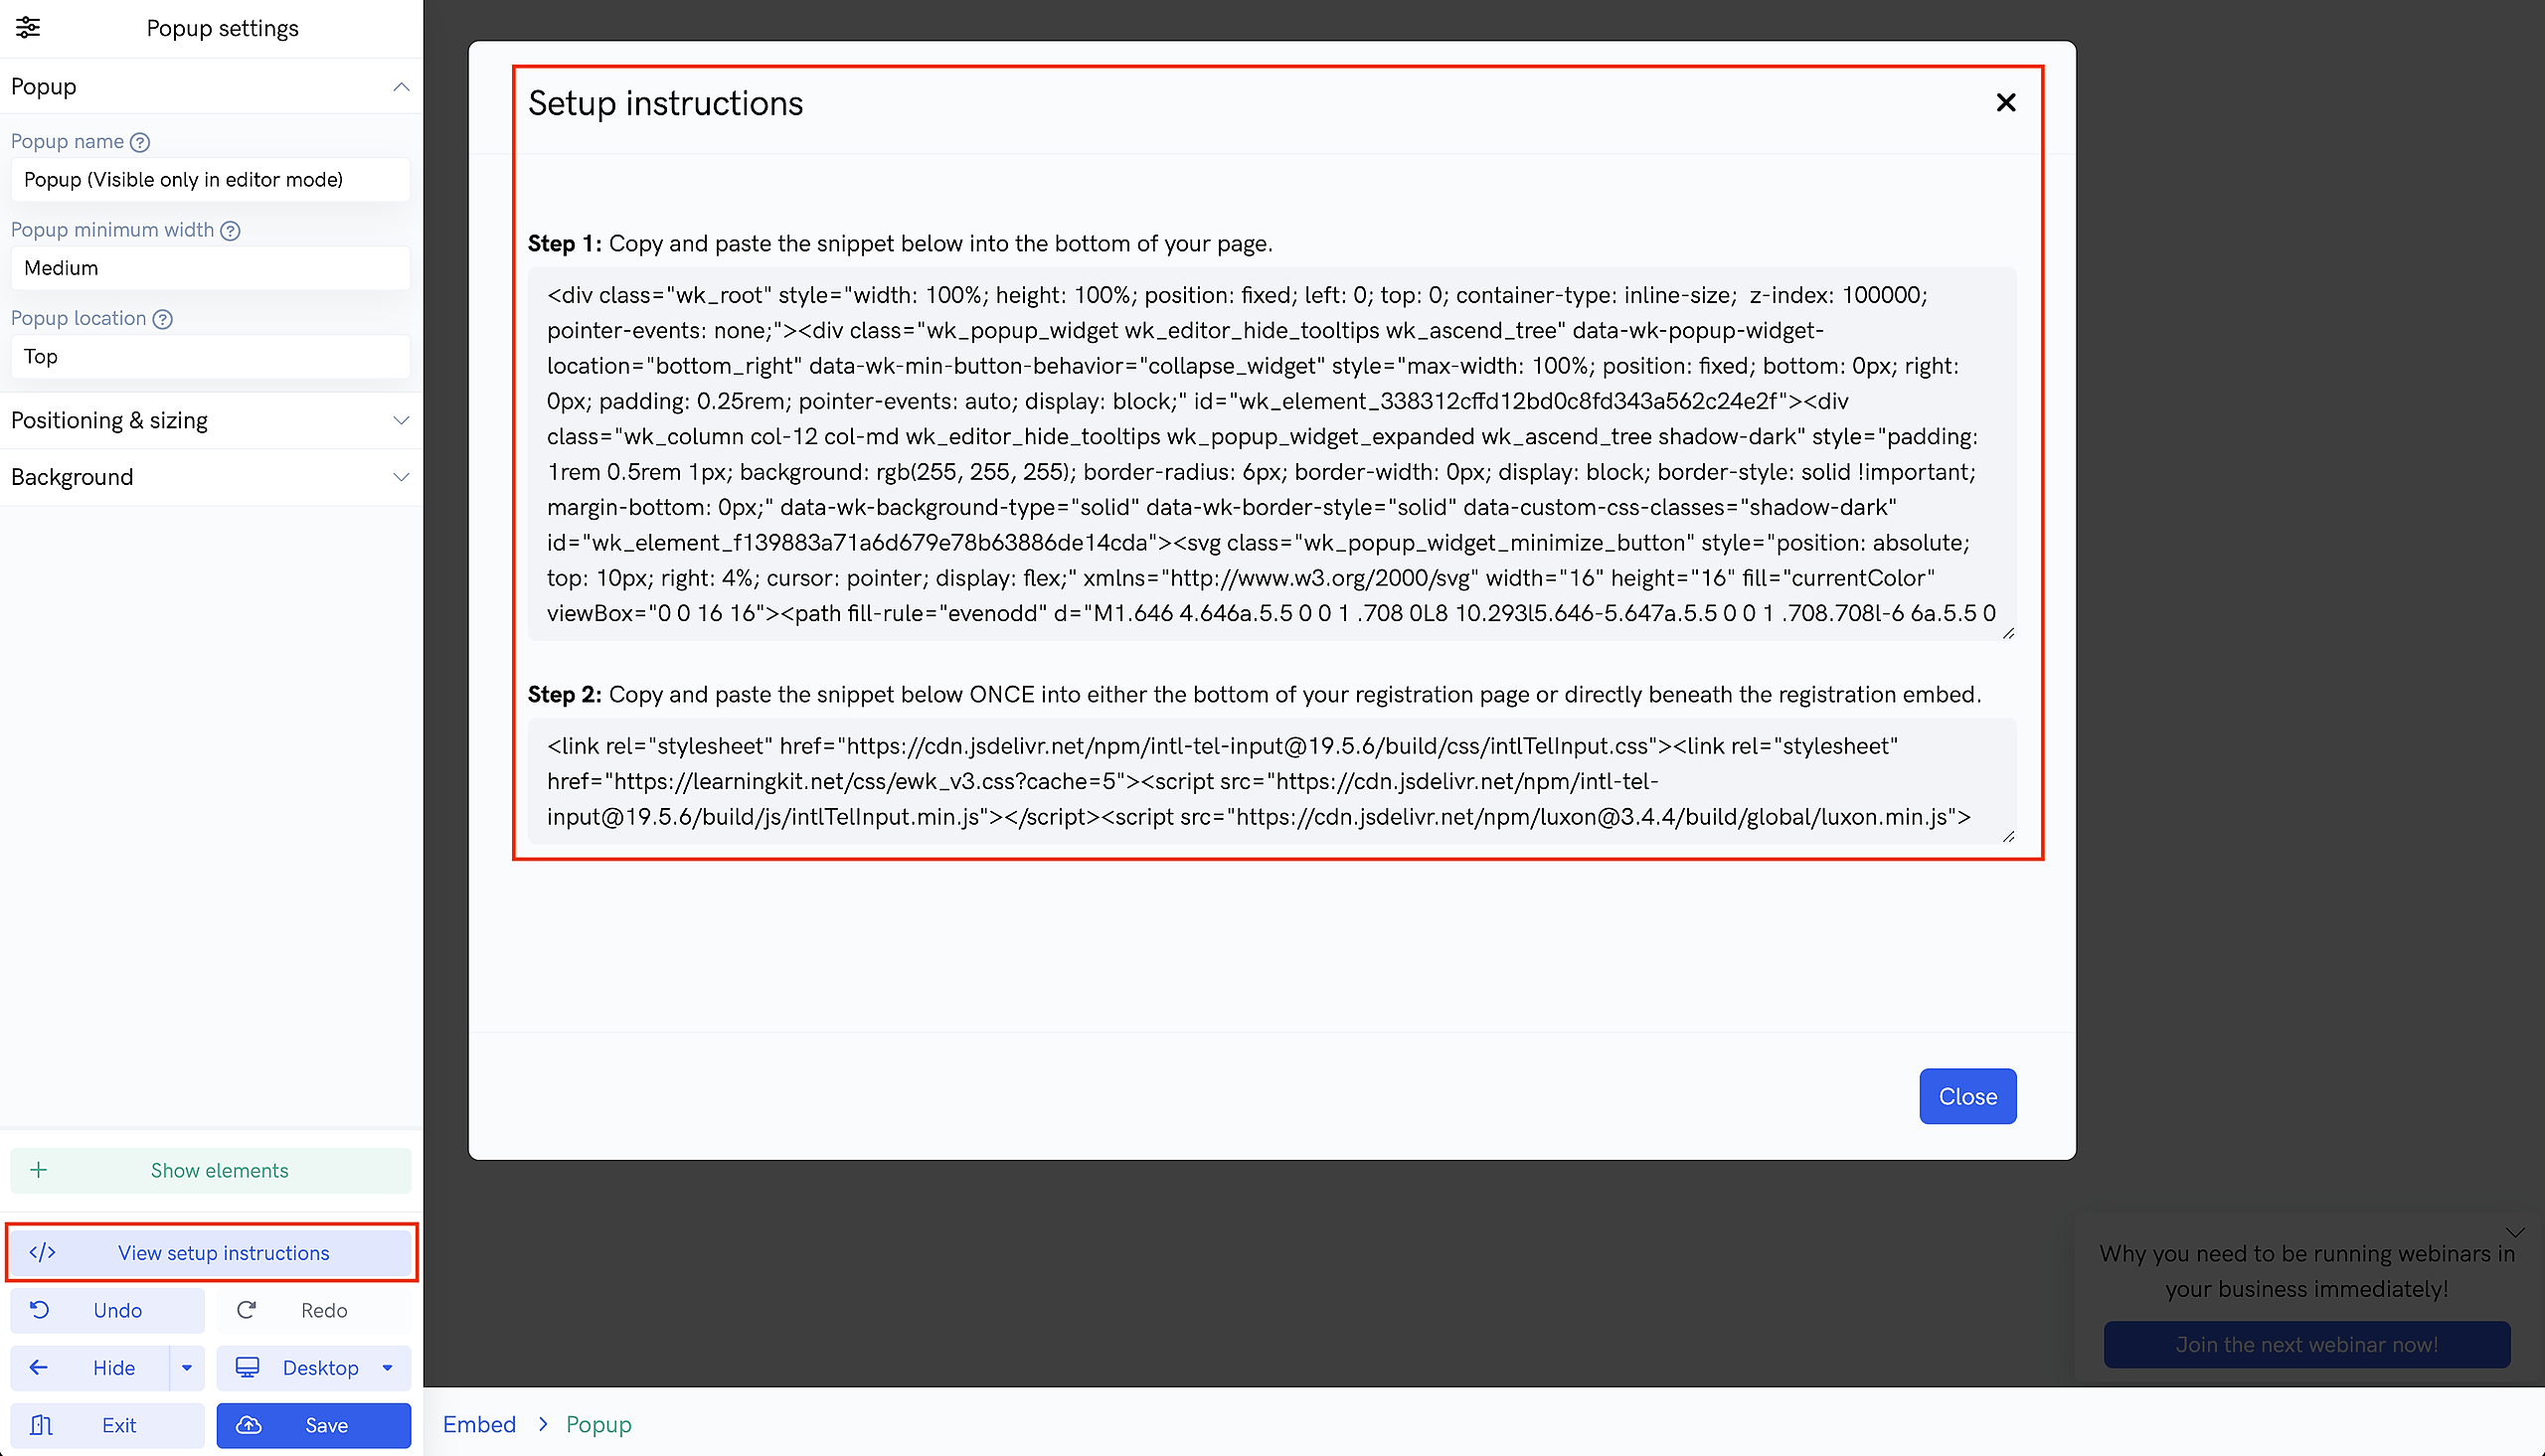
You'll want to copy the "Step 1" snippet and paste it into the site or page.
You'll also need to copy and paste the "Step 2" snippet ONCE into the bottom of your page or site.
Once the form is embedded onto your page or website, you'll be able to immediately see your widget in the corner of the page and start getting registrations!