In this tutorial, you'll learn how to add WebinarKit's registration or thank you embeds onto your own custom pages and websites. This is a great option if you already have a custom registration or thank you page that you want to use instead of WebinarKit's built-in pages.
Please note that this feature does require access to WebinarKit Pro, WebinarKit Live, or WebinarKit White Label.
Get started
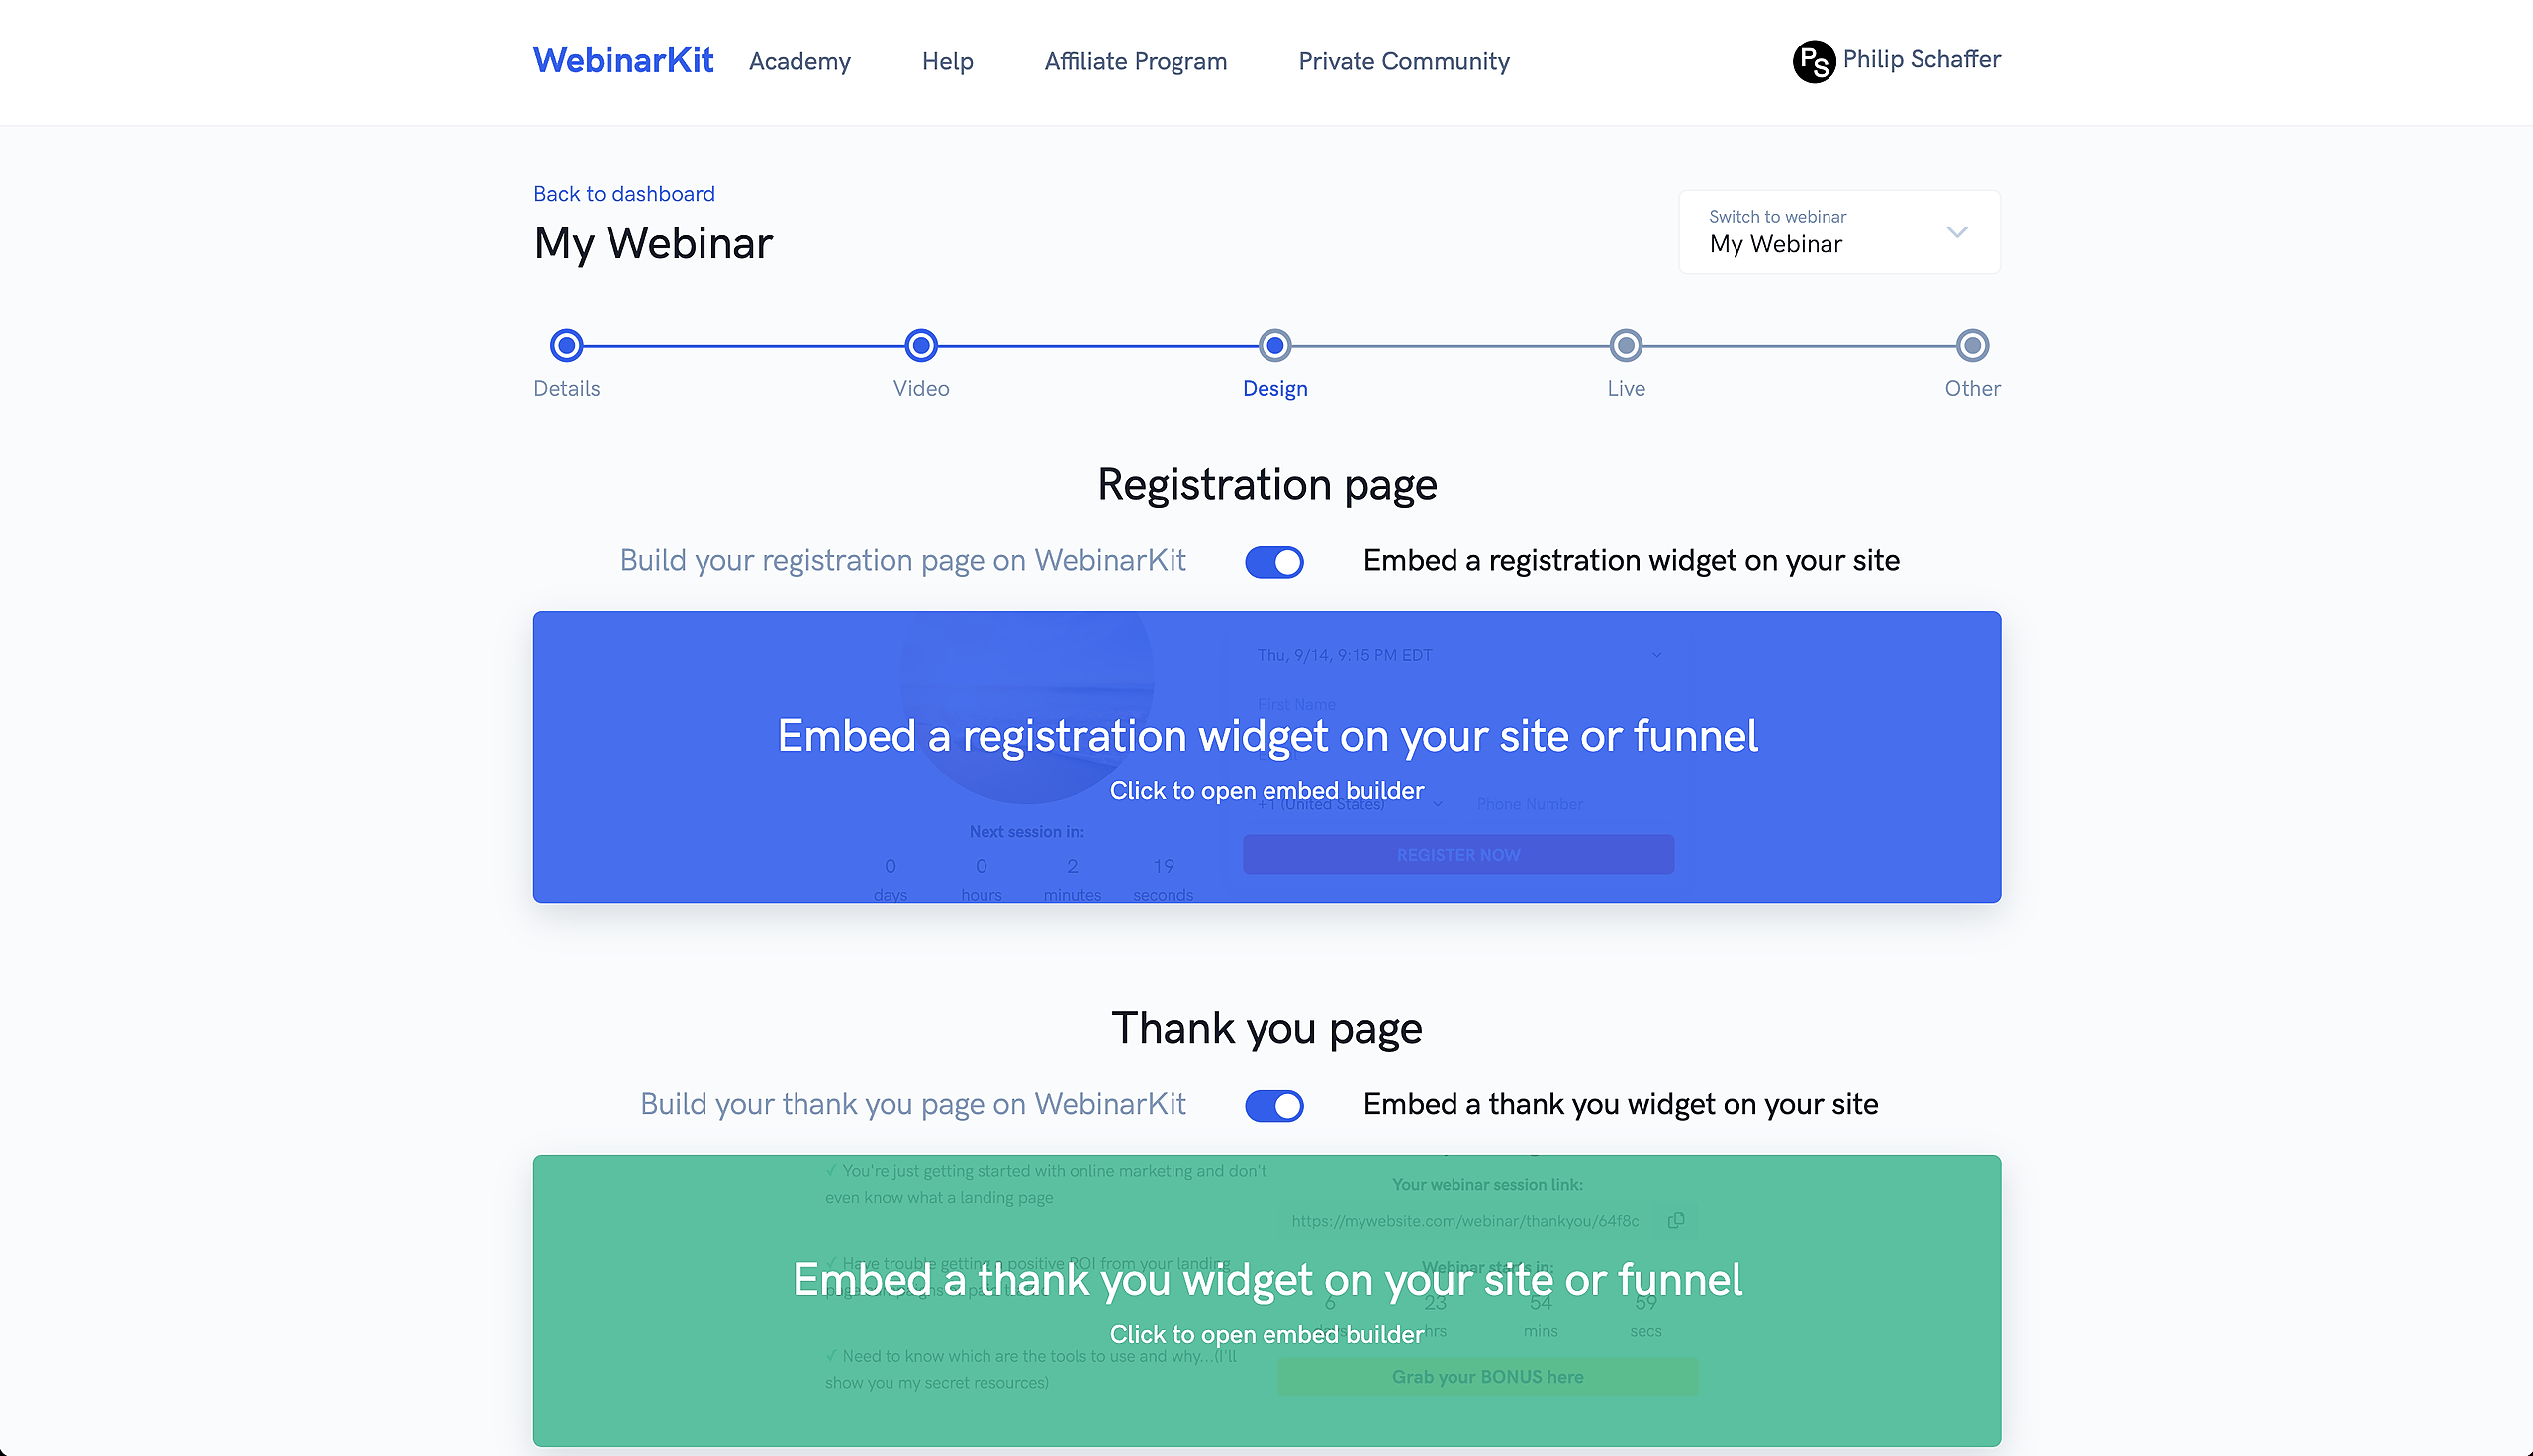
Start by opening up the settings for the event you want and navigating to the "Design" page.
On the design page, set the toggle to "Embed a registration widget on your site" for registration embeds or "Embed a thank you widget on your site" for thank you embeds. Then click whichever option you want an embed for.
Inside the embed builder, you'll be shown the drag & drop embed builder. Depending on which type of embed you're editing, you can choose from a few different embed types. For example, for registration embeds you can choose an "inline" embed form or a popup widget. You can also drag and drop elements (including videos) into your embeds for full customization!
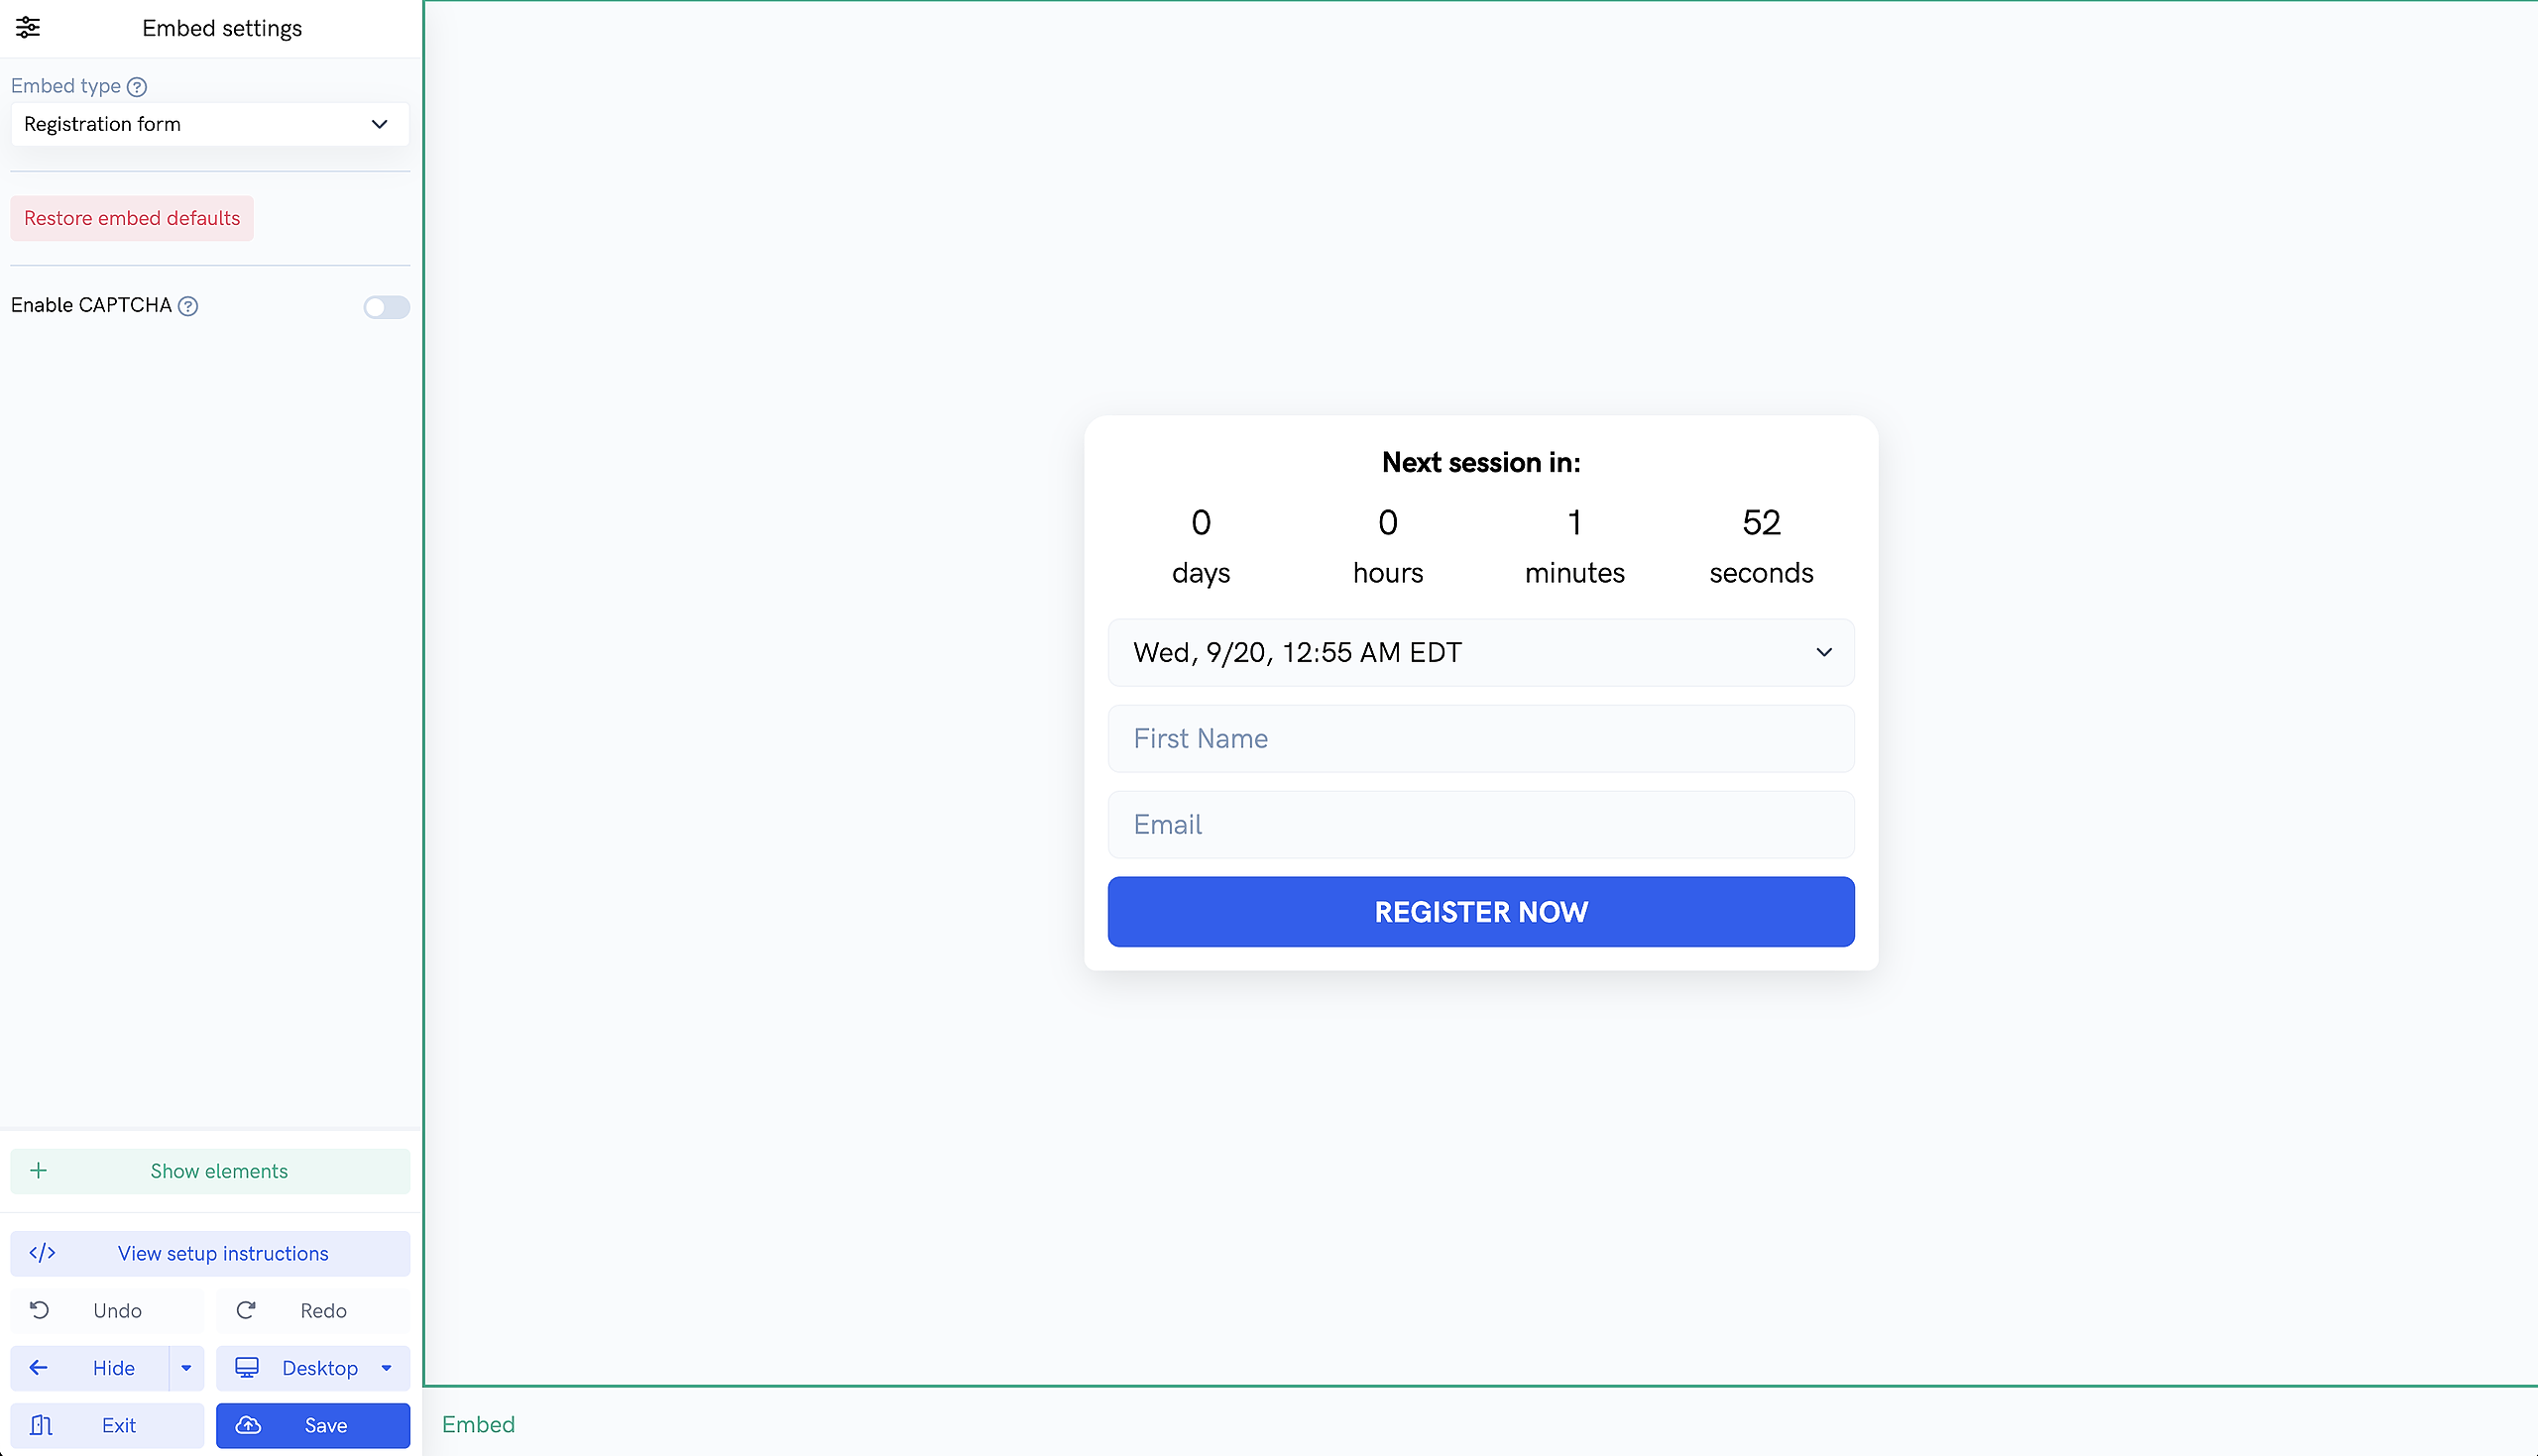
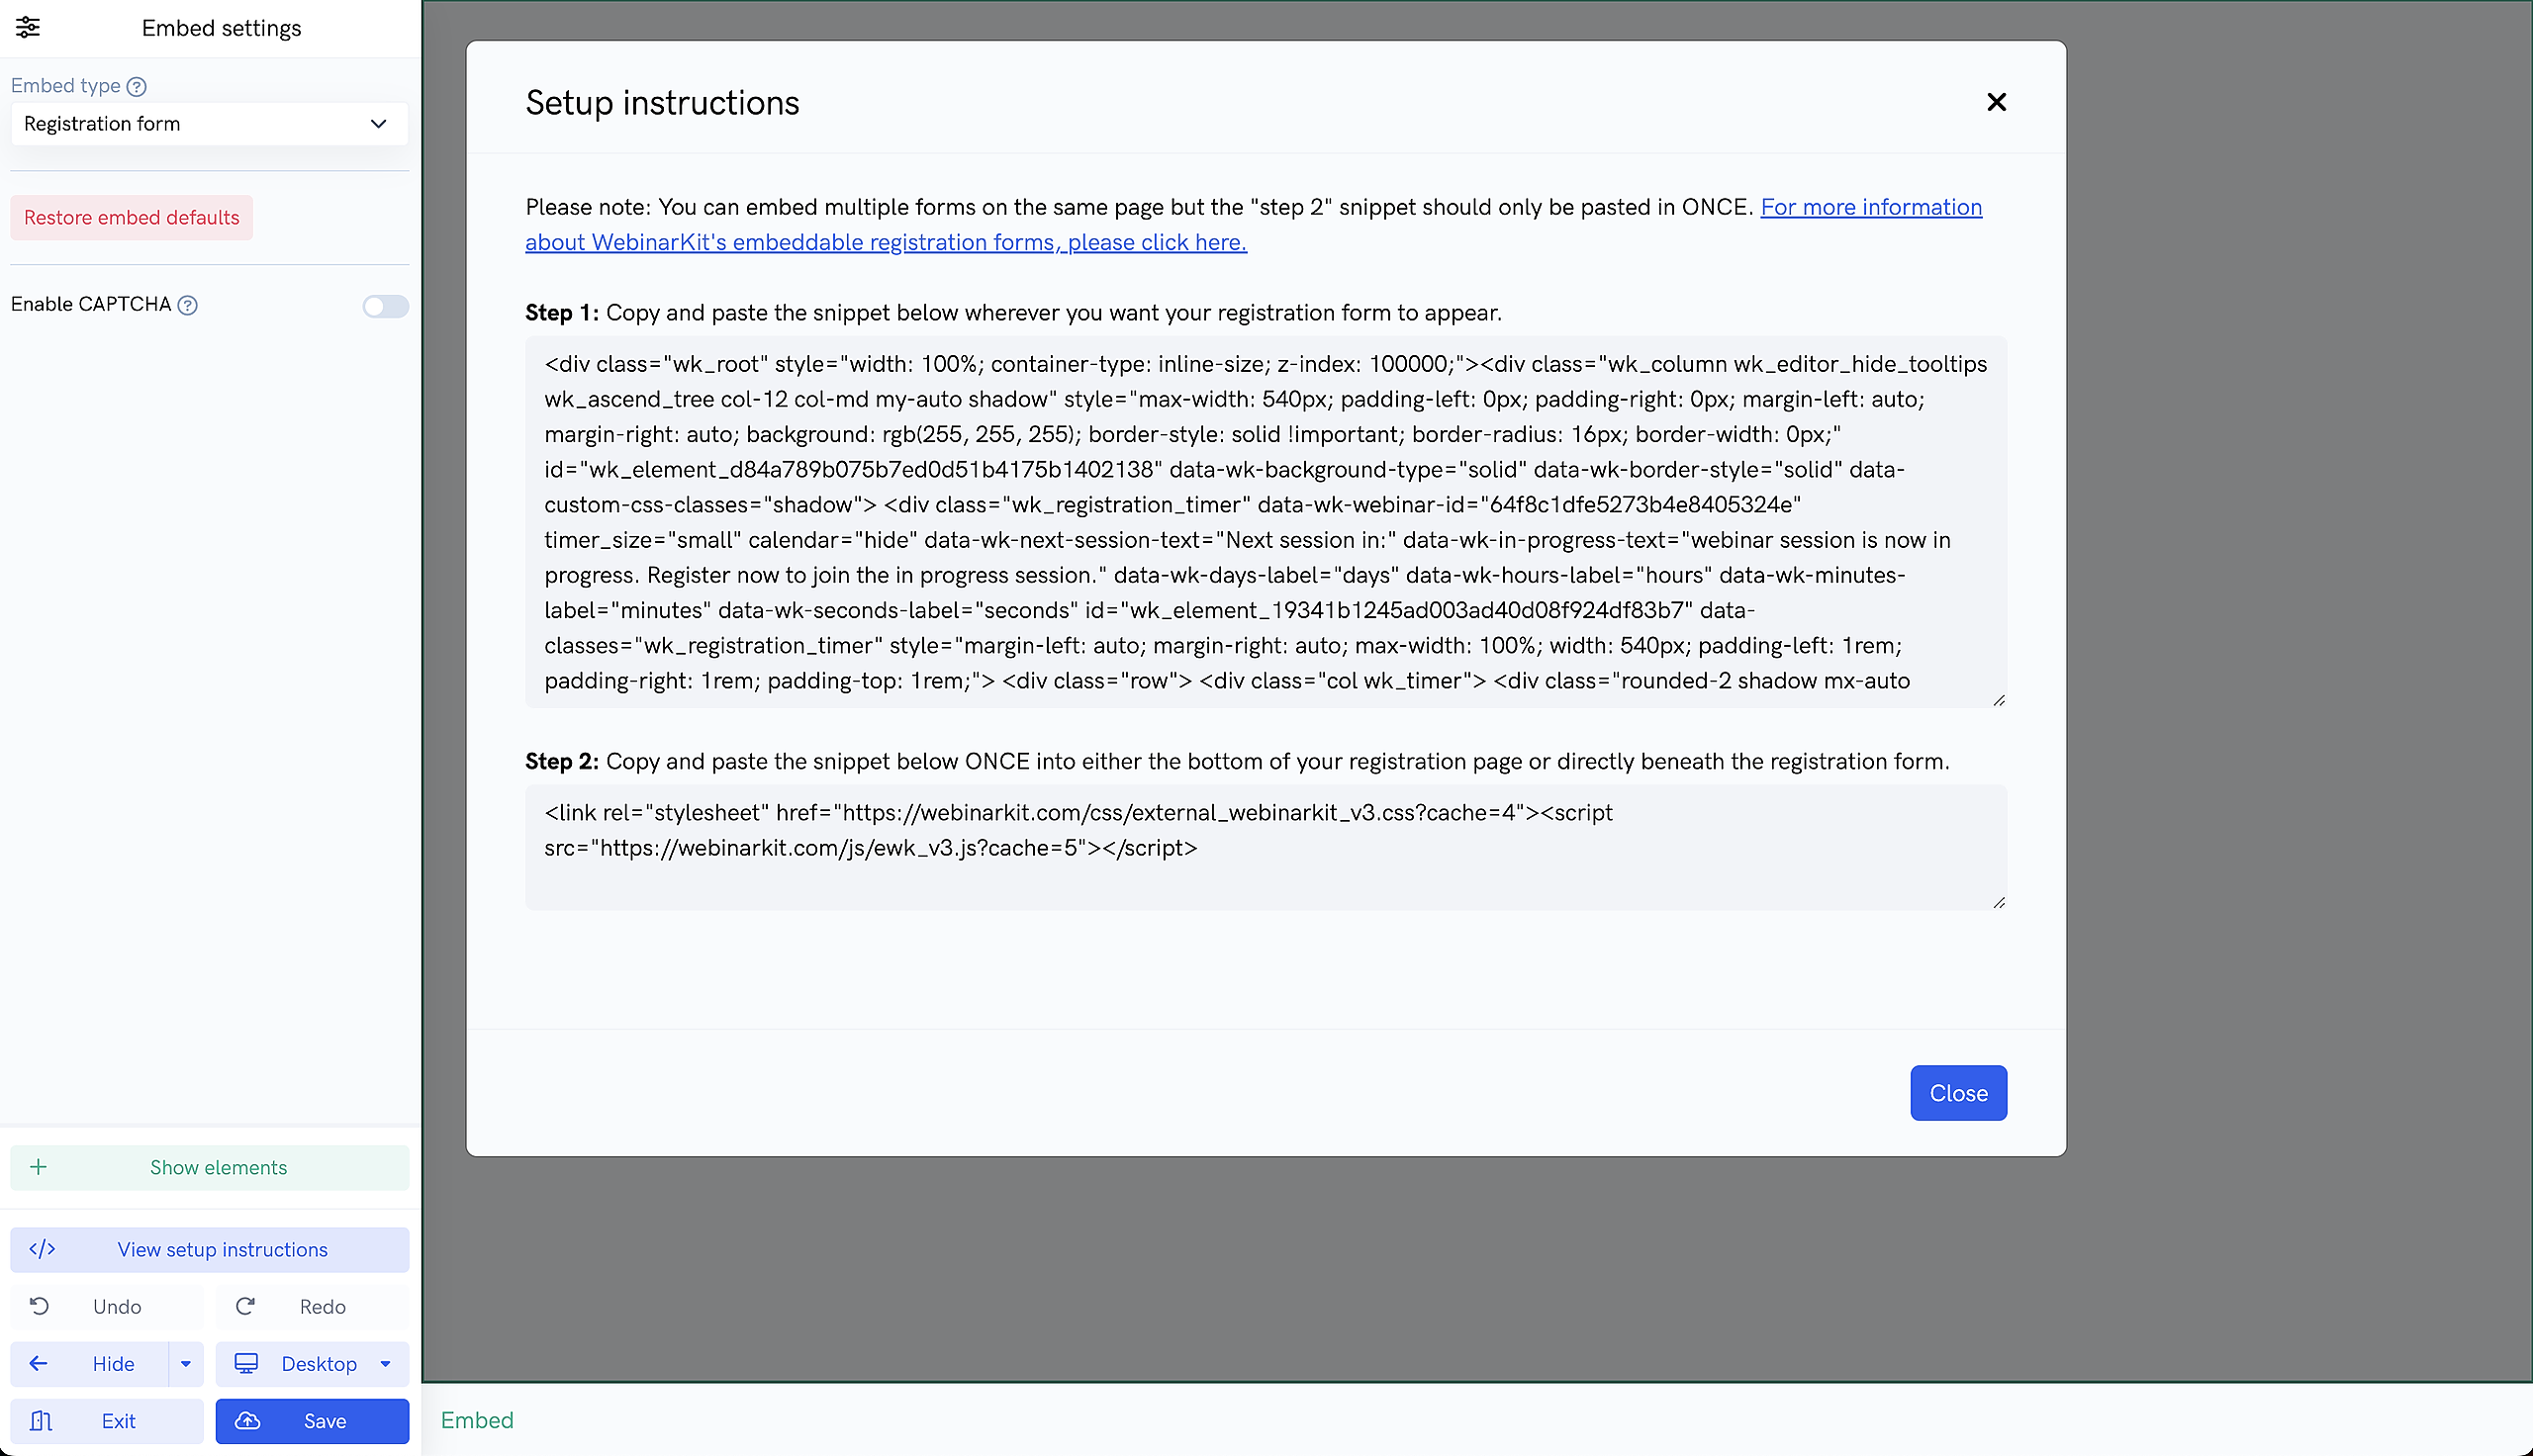
Once you've customized your embed to your liking, click the "View setup instructions" button from the side panel.
Registration pages
If you're embedding the "standard" / "inline" registration form, you can place multiple copies of the HTML snippet (Step 1 snippet) onto your page. If you're embedding the registration popup widget, you should only place once copy onto your page.
You'll also need to copy and paste the script snippet (Step 2 snippet) ONCE into the bottom of your landing page. Please note, you only need to paste this snippet in ONCE, even if you add multiple "inline" registration forms onto your registration page.
Once the registration form is embedded onto your landing page or website, you'll be able to immediately start getting registrants for your event!
Thank you pages
If you're wanting to use a custom thank you page, YOU MUST add the thank you embed to your custom page. The thank you embed is what redirects registrants to the watch room when it's time for your event.
Follow the setup instructions provided in the thank you embed builder. Once you've set up your custom thank you page, we highly recommend doing a test registration for your event to make sure everything is working correctly.
Troubleshooting
If you are having issues with your registration embed not showing your event dates, it might be due to the way some websites and page builders embed custom HTML (Wix.com for example). In some cases, this prevents your registration form from loading properly.
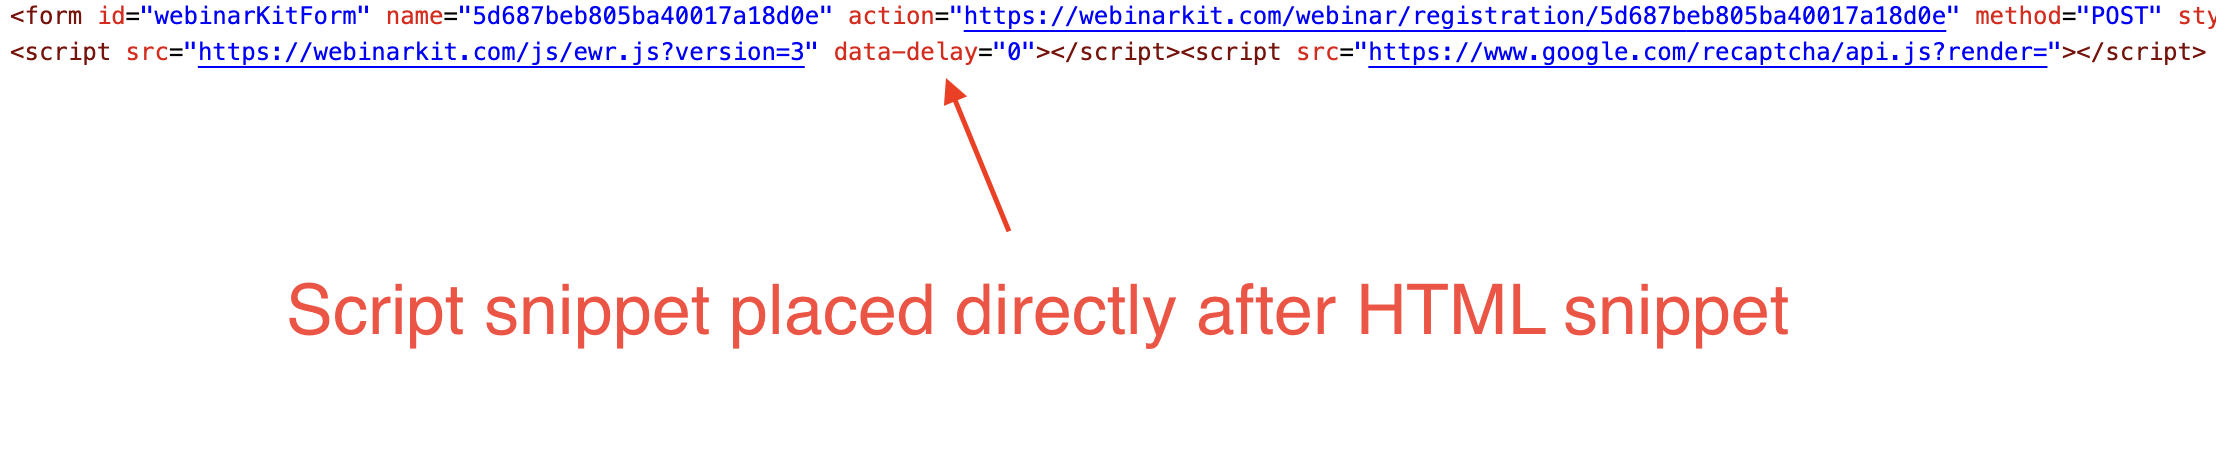
One way to potentially fix this issue is by placing the script snippet (the Step 2 snippet from the photo above), directly underneath the HTML snippet. Often times, this will allow your registration form to work properly. You can see an example of what this would look like in the screenshot below.