Thanks to our powerful page builder, you can create a high converting registration, thank you, or replay page very easily. Or alternatively, you can use our embed builder to create and customize registration and thank you widgets which can be placed directly onto your own website!
Please note: This tutorial will largely show screenshots of the page builder but almost everything shown and discussed can be applied to the embed builder as well.
Table of contents
Getting started
Creating a high converting registration page in minutes
Builder basics
Builder elements
Getting started
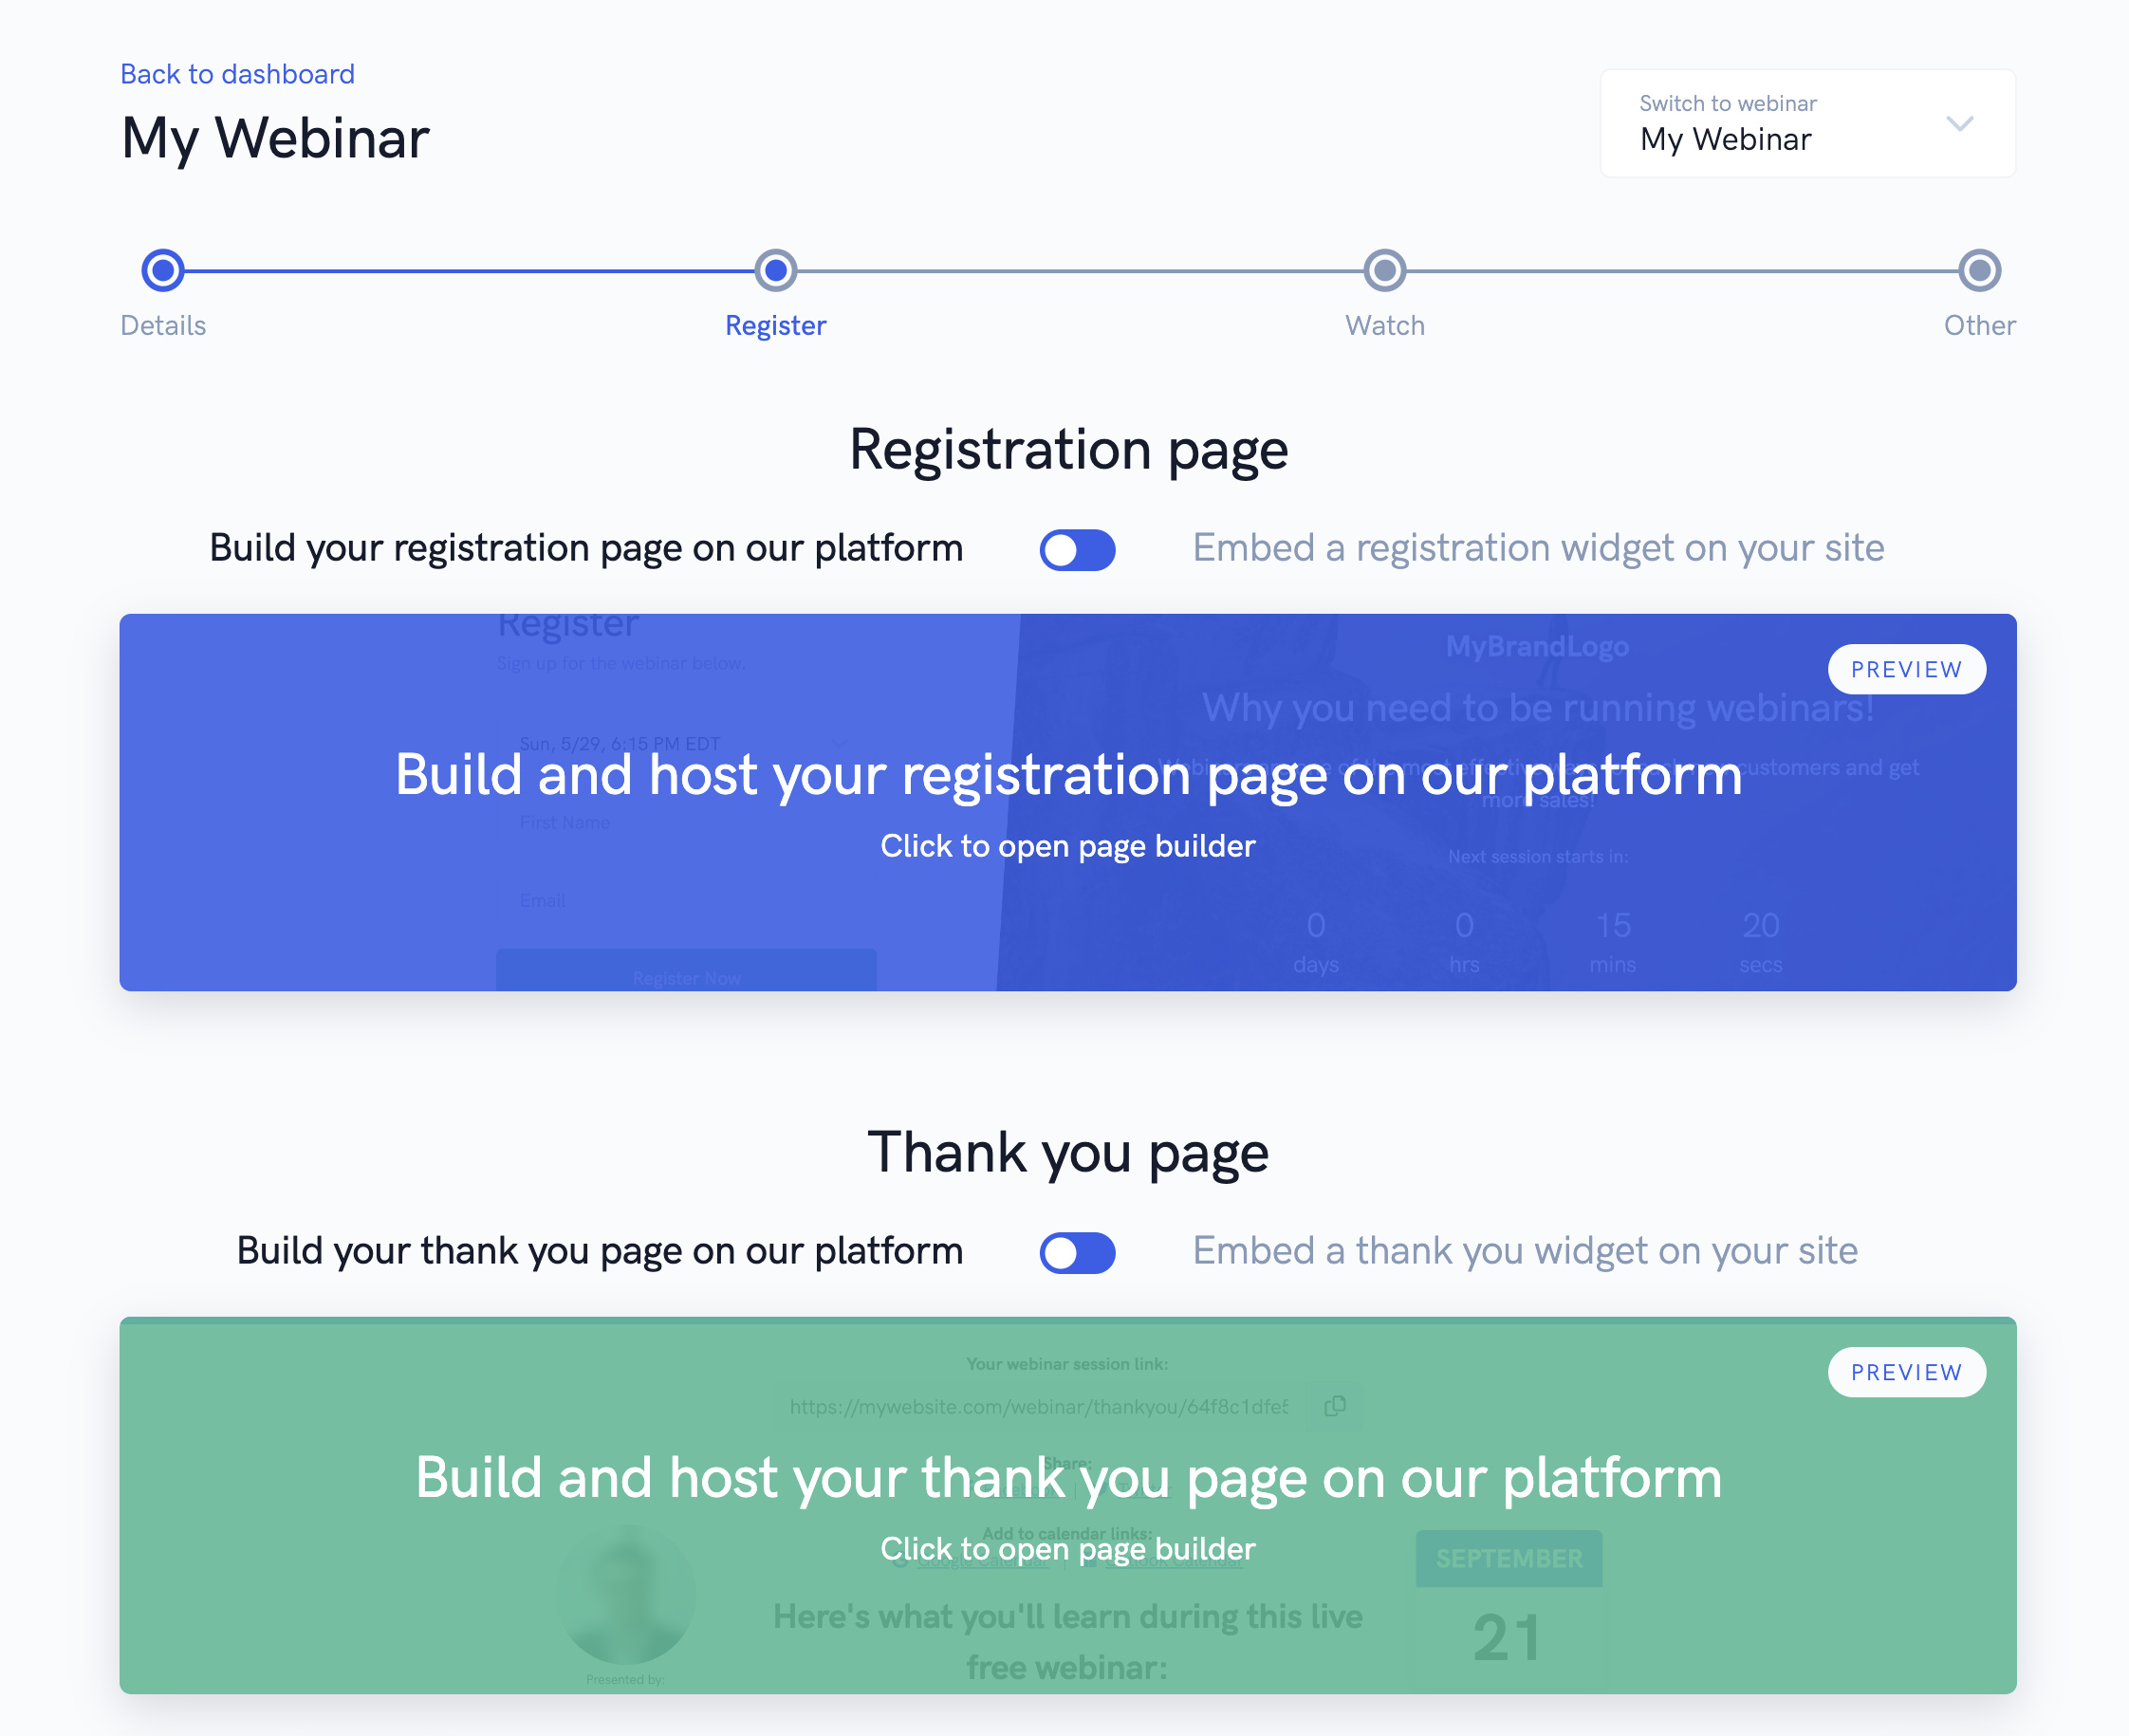
To get started with customizing your various pages, find the webinar you want to edit from your dashboard, and navigate to the registration, thank you, or replay page section. Then, toggle whether you want to use our built-in pages OR embed a widget onto your own site, and lastly, click into the builder to get started!
Creating a high converting registration page in minutes
Later on this article, we'll dive into the various aspects of the page & embed builder in detail. But in this section, we'll show you how to just create a great looking, high converting landing page for your webinar in a few minutes.
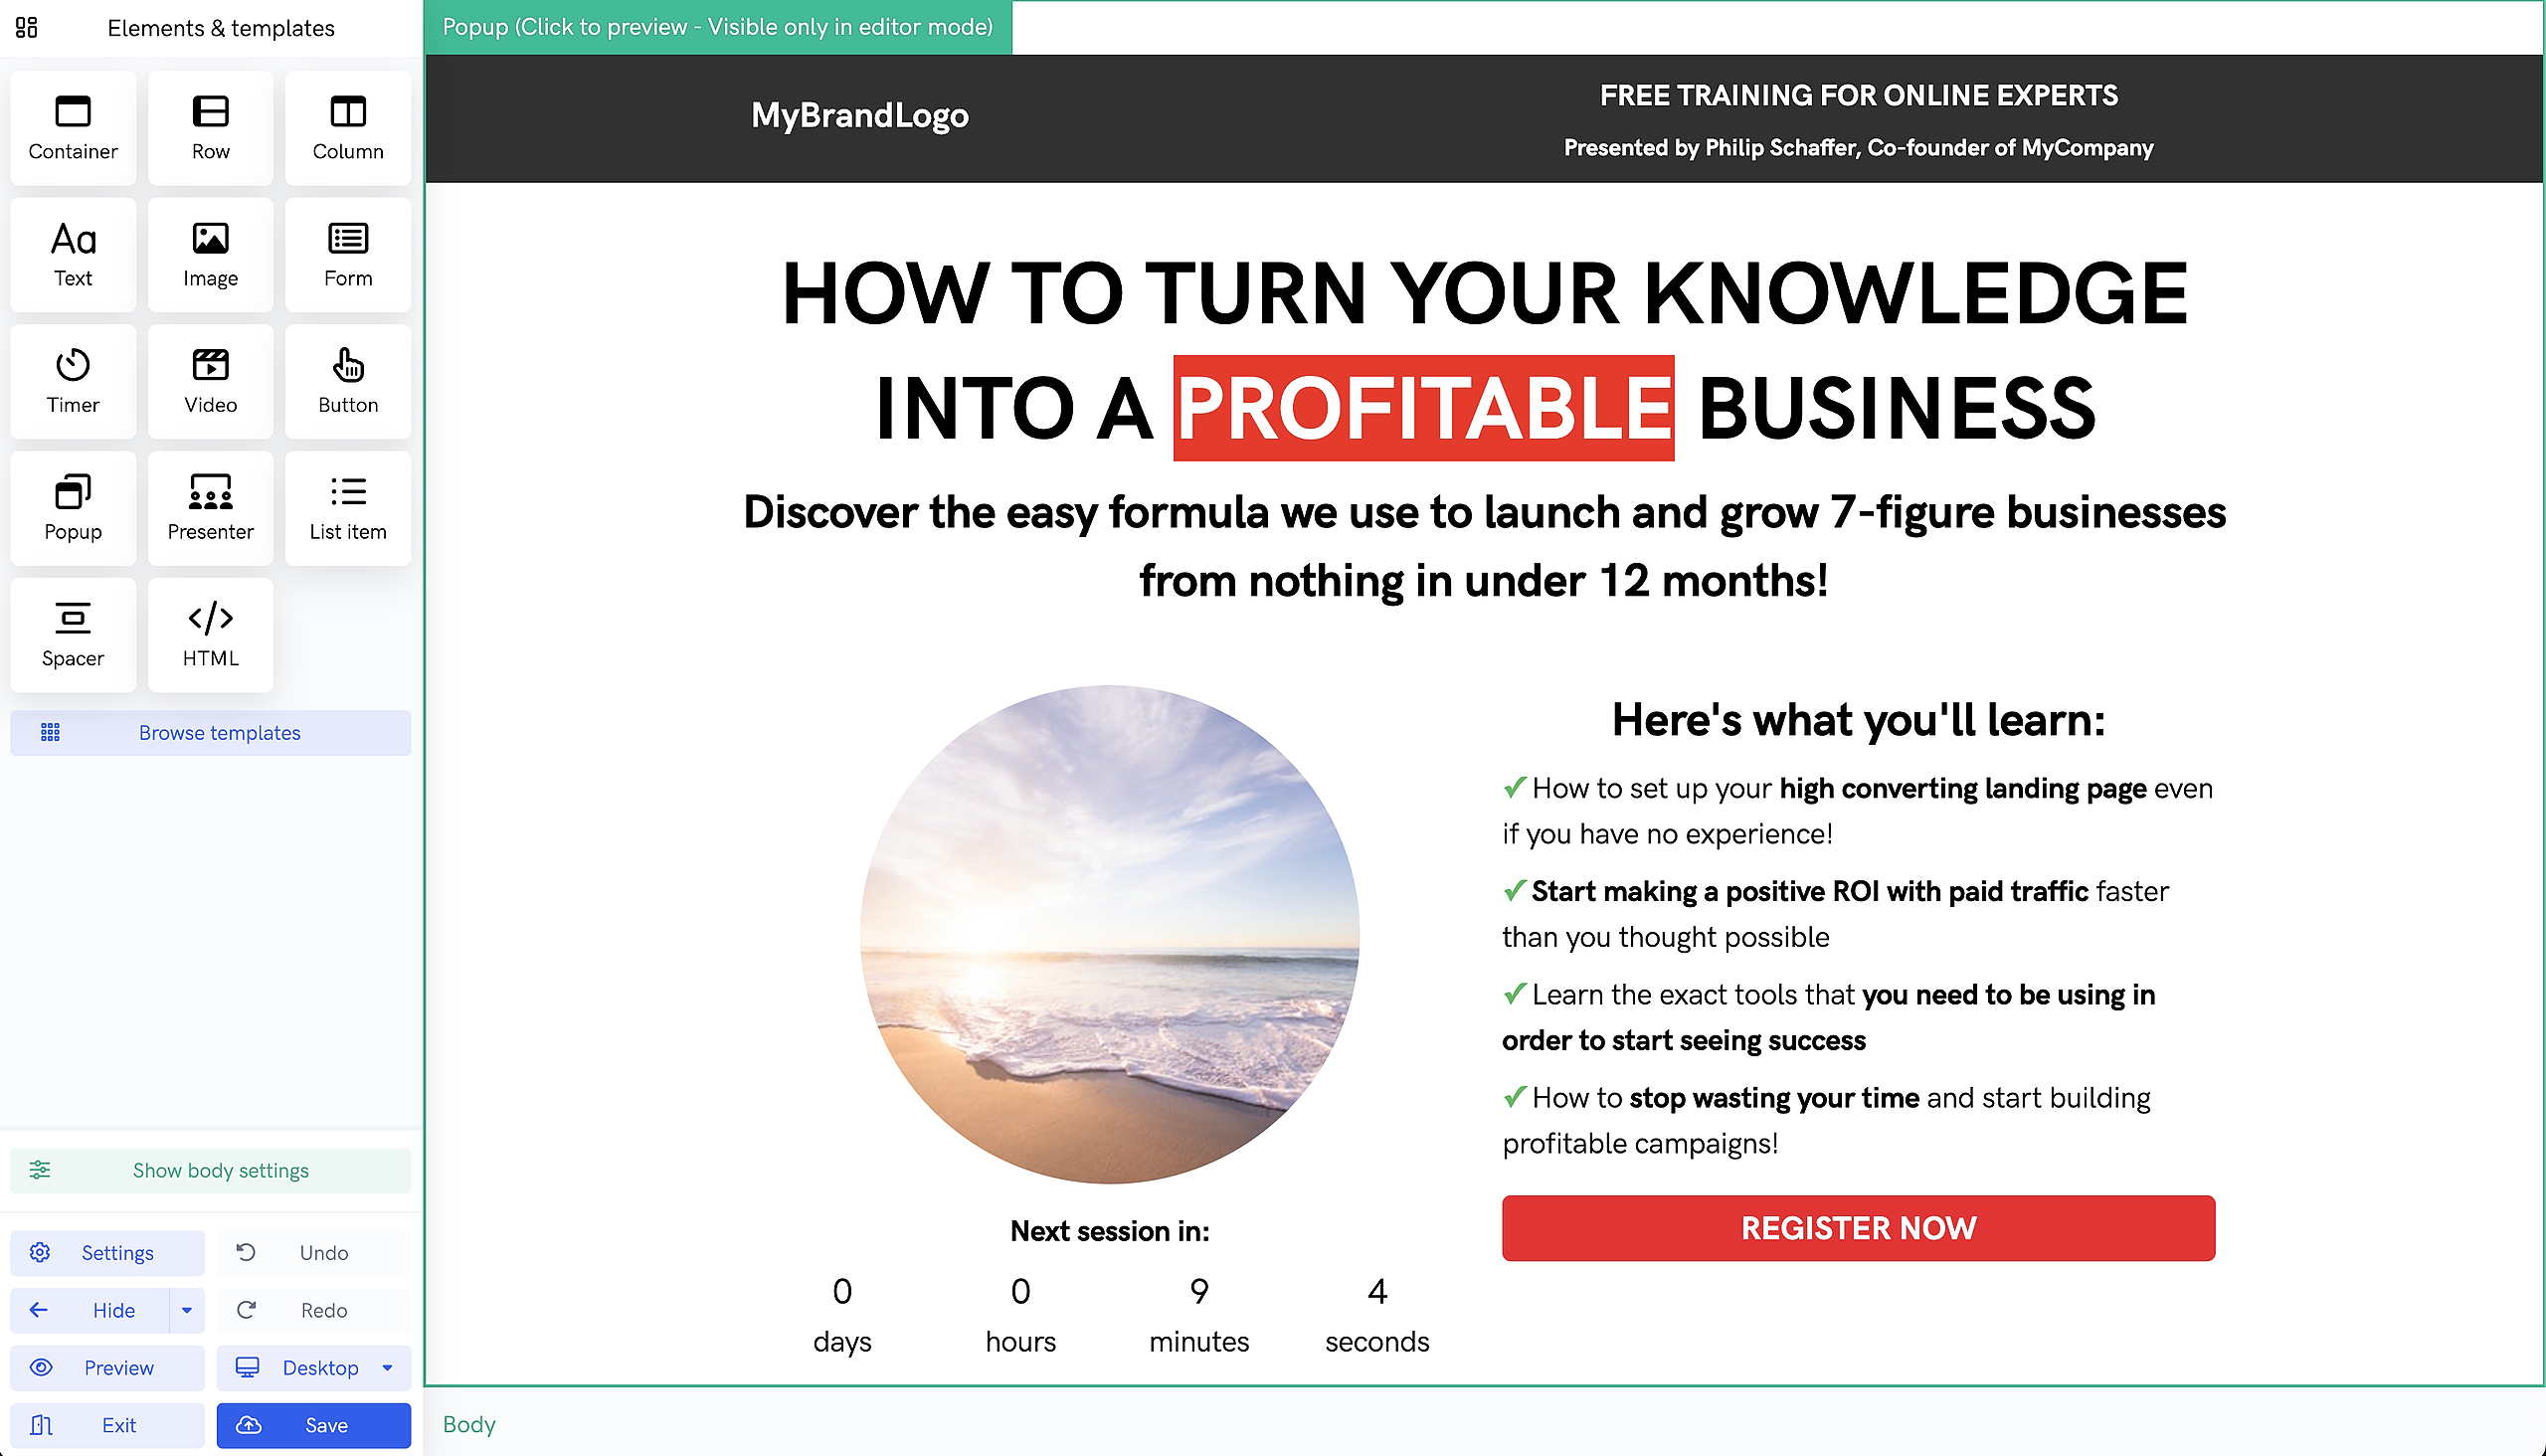
When you open up your webinar's registration page builder, you'll immediately see what your registration page currently looks like. If you want to get up and running as fast as possible, you can simply use the default template you start with or browse our other registration page templates by clicking on the "Browse templates" button on the left hand side of the builder.

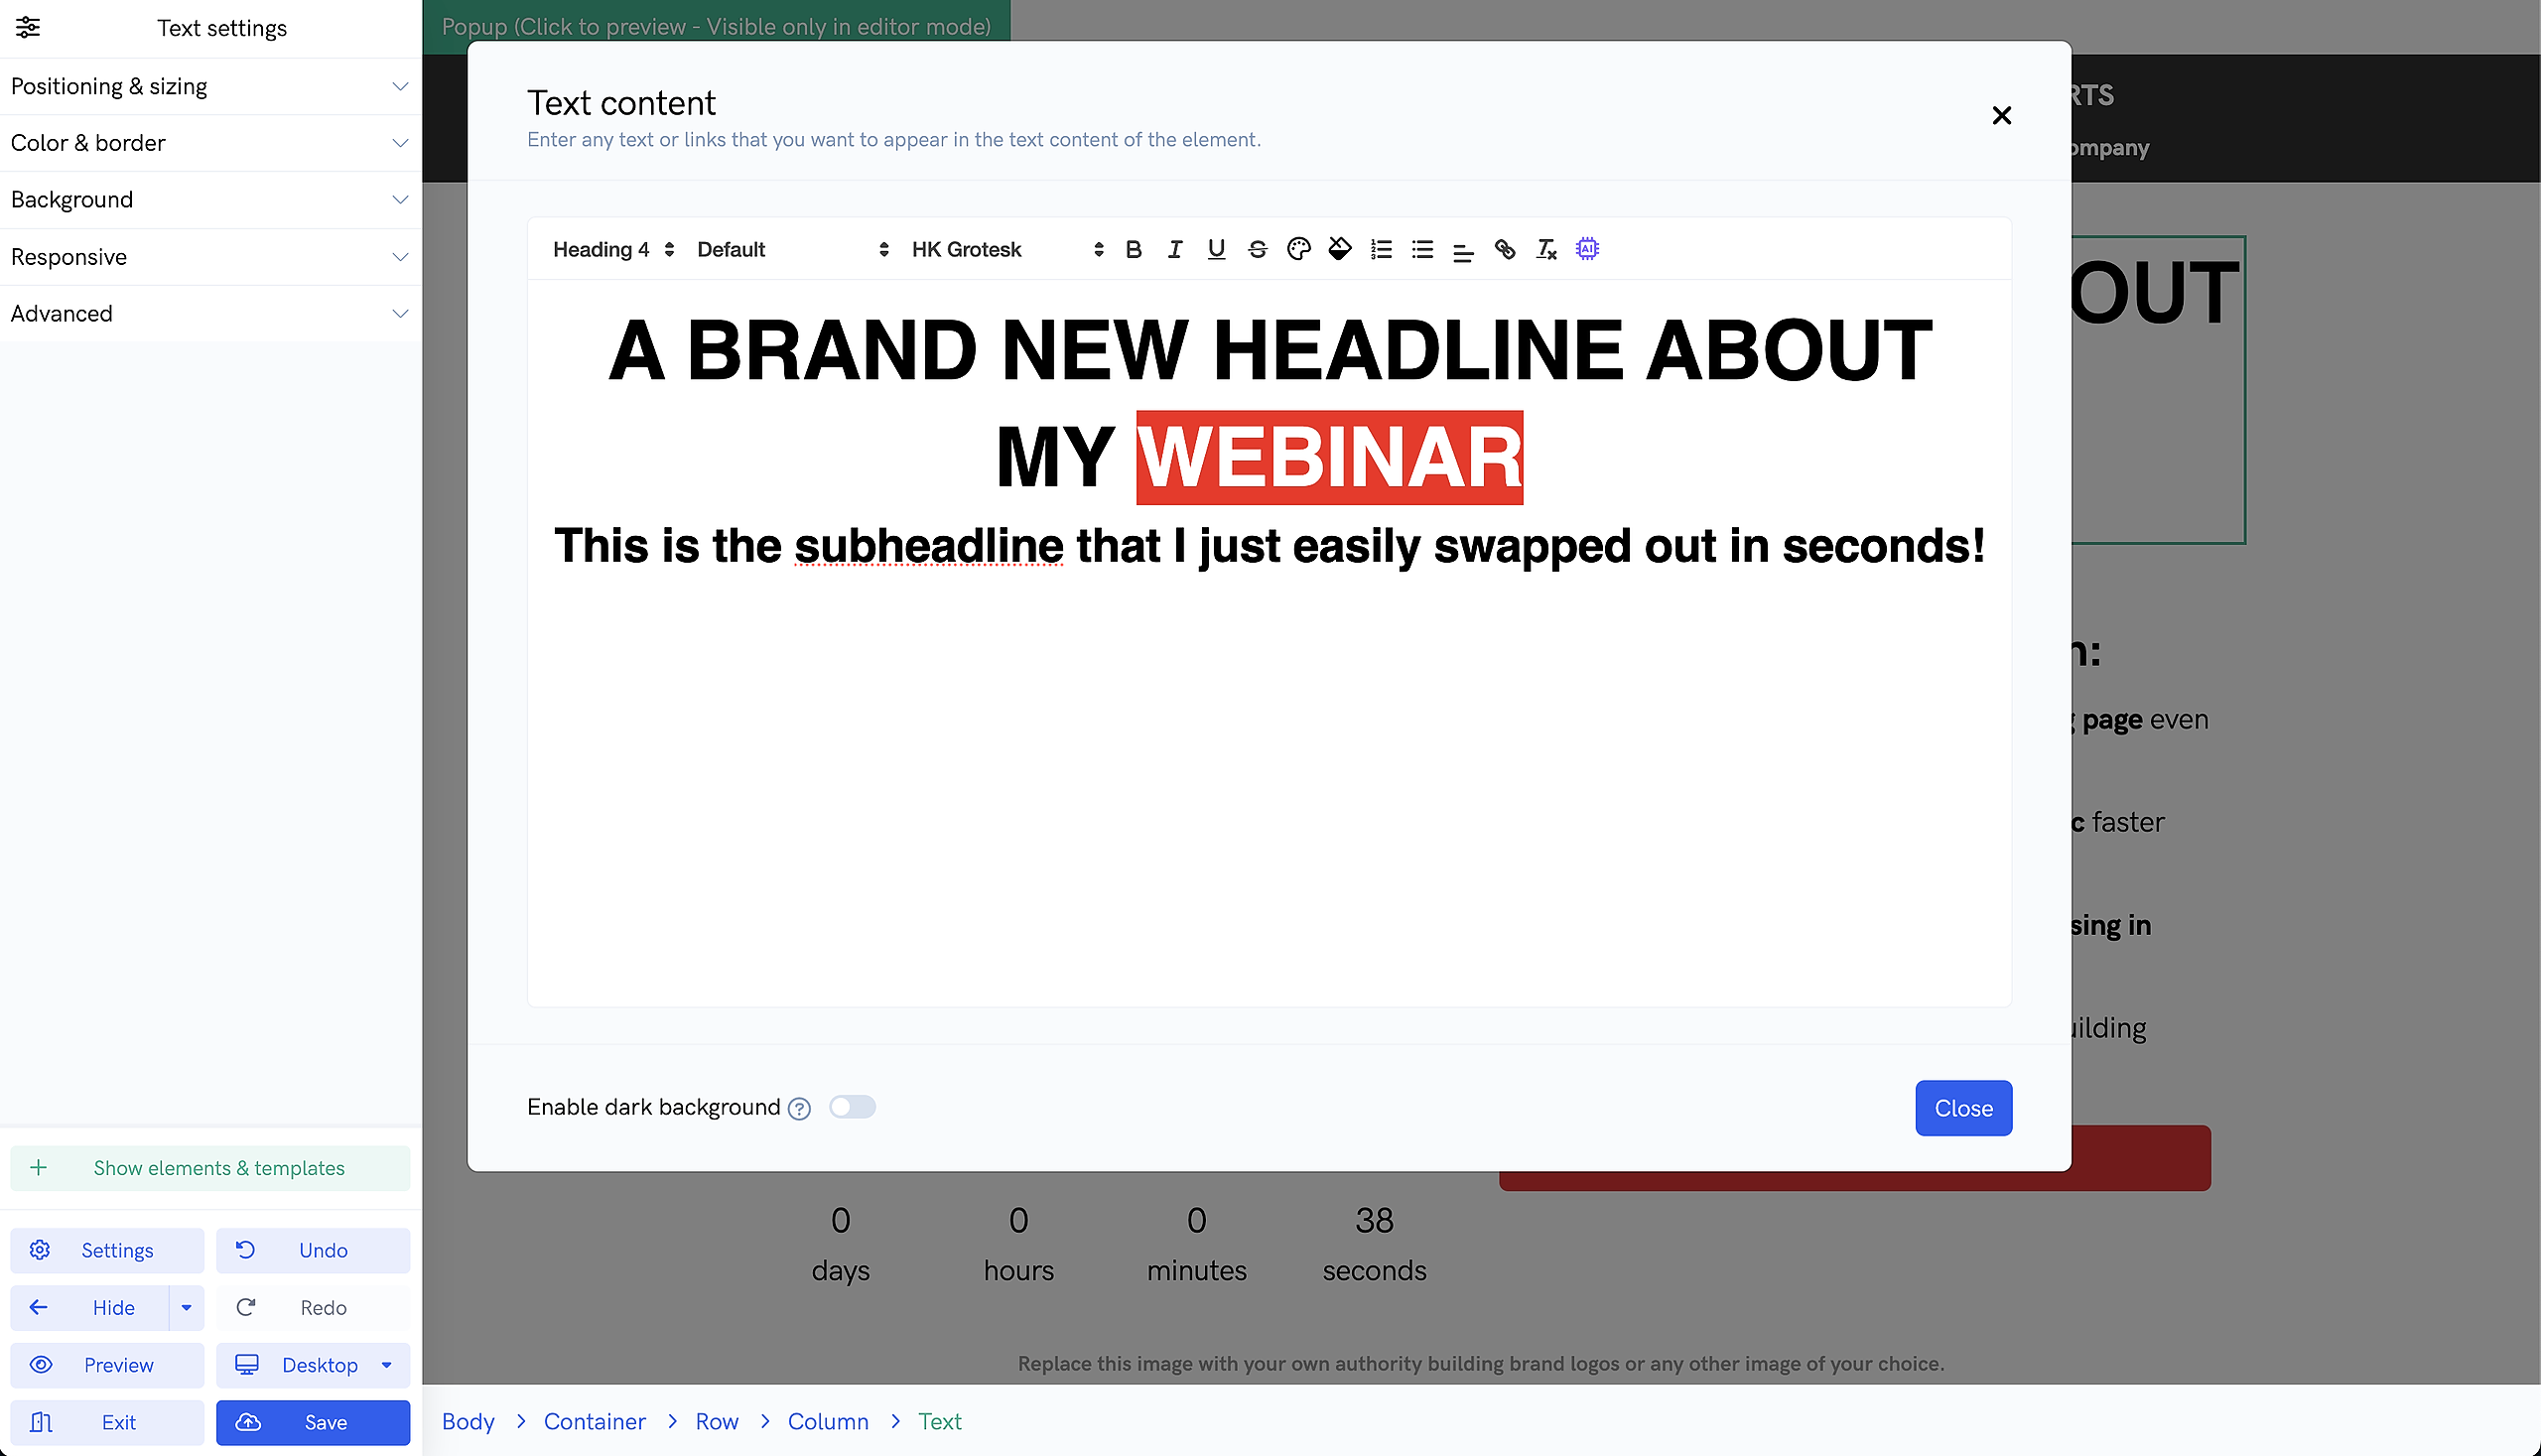
Once you settle on a template you like, you can double click on any text element to quickly open up the text editor and replace its content with your own desired content. You can also double click on any images to replace them with images uploaded to your media library.
Once you've made your changes, simply click the "Save" button on the bottom left of the page builder, and then click "Exit" to be taken back to the webinar settings page.
That's it! You now have a high converting webinar registration page (that's using the webinar dates added to your webinar's schedule).
So that's how to get up and running super fast. But our page and embed builders actually come with a lot of powerful features. So if you're interested in learning more, keep reading down below!
Builder basics
When you open up the page / embed builder, you'll be taken to a page where you can visually edit your pages in real time using an drag & drop interface.
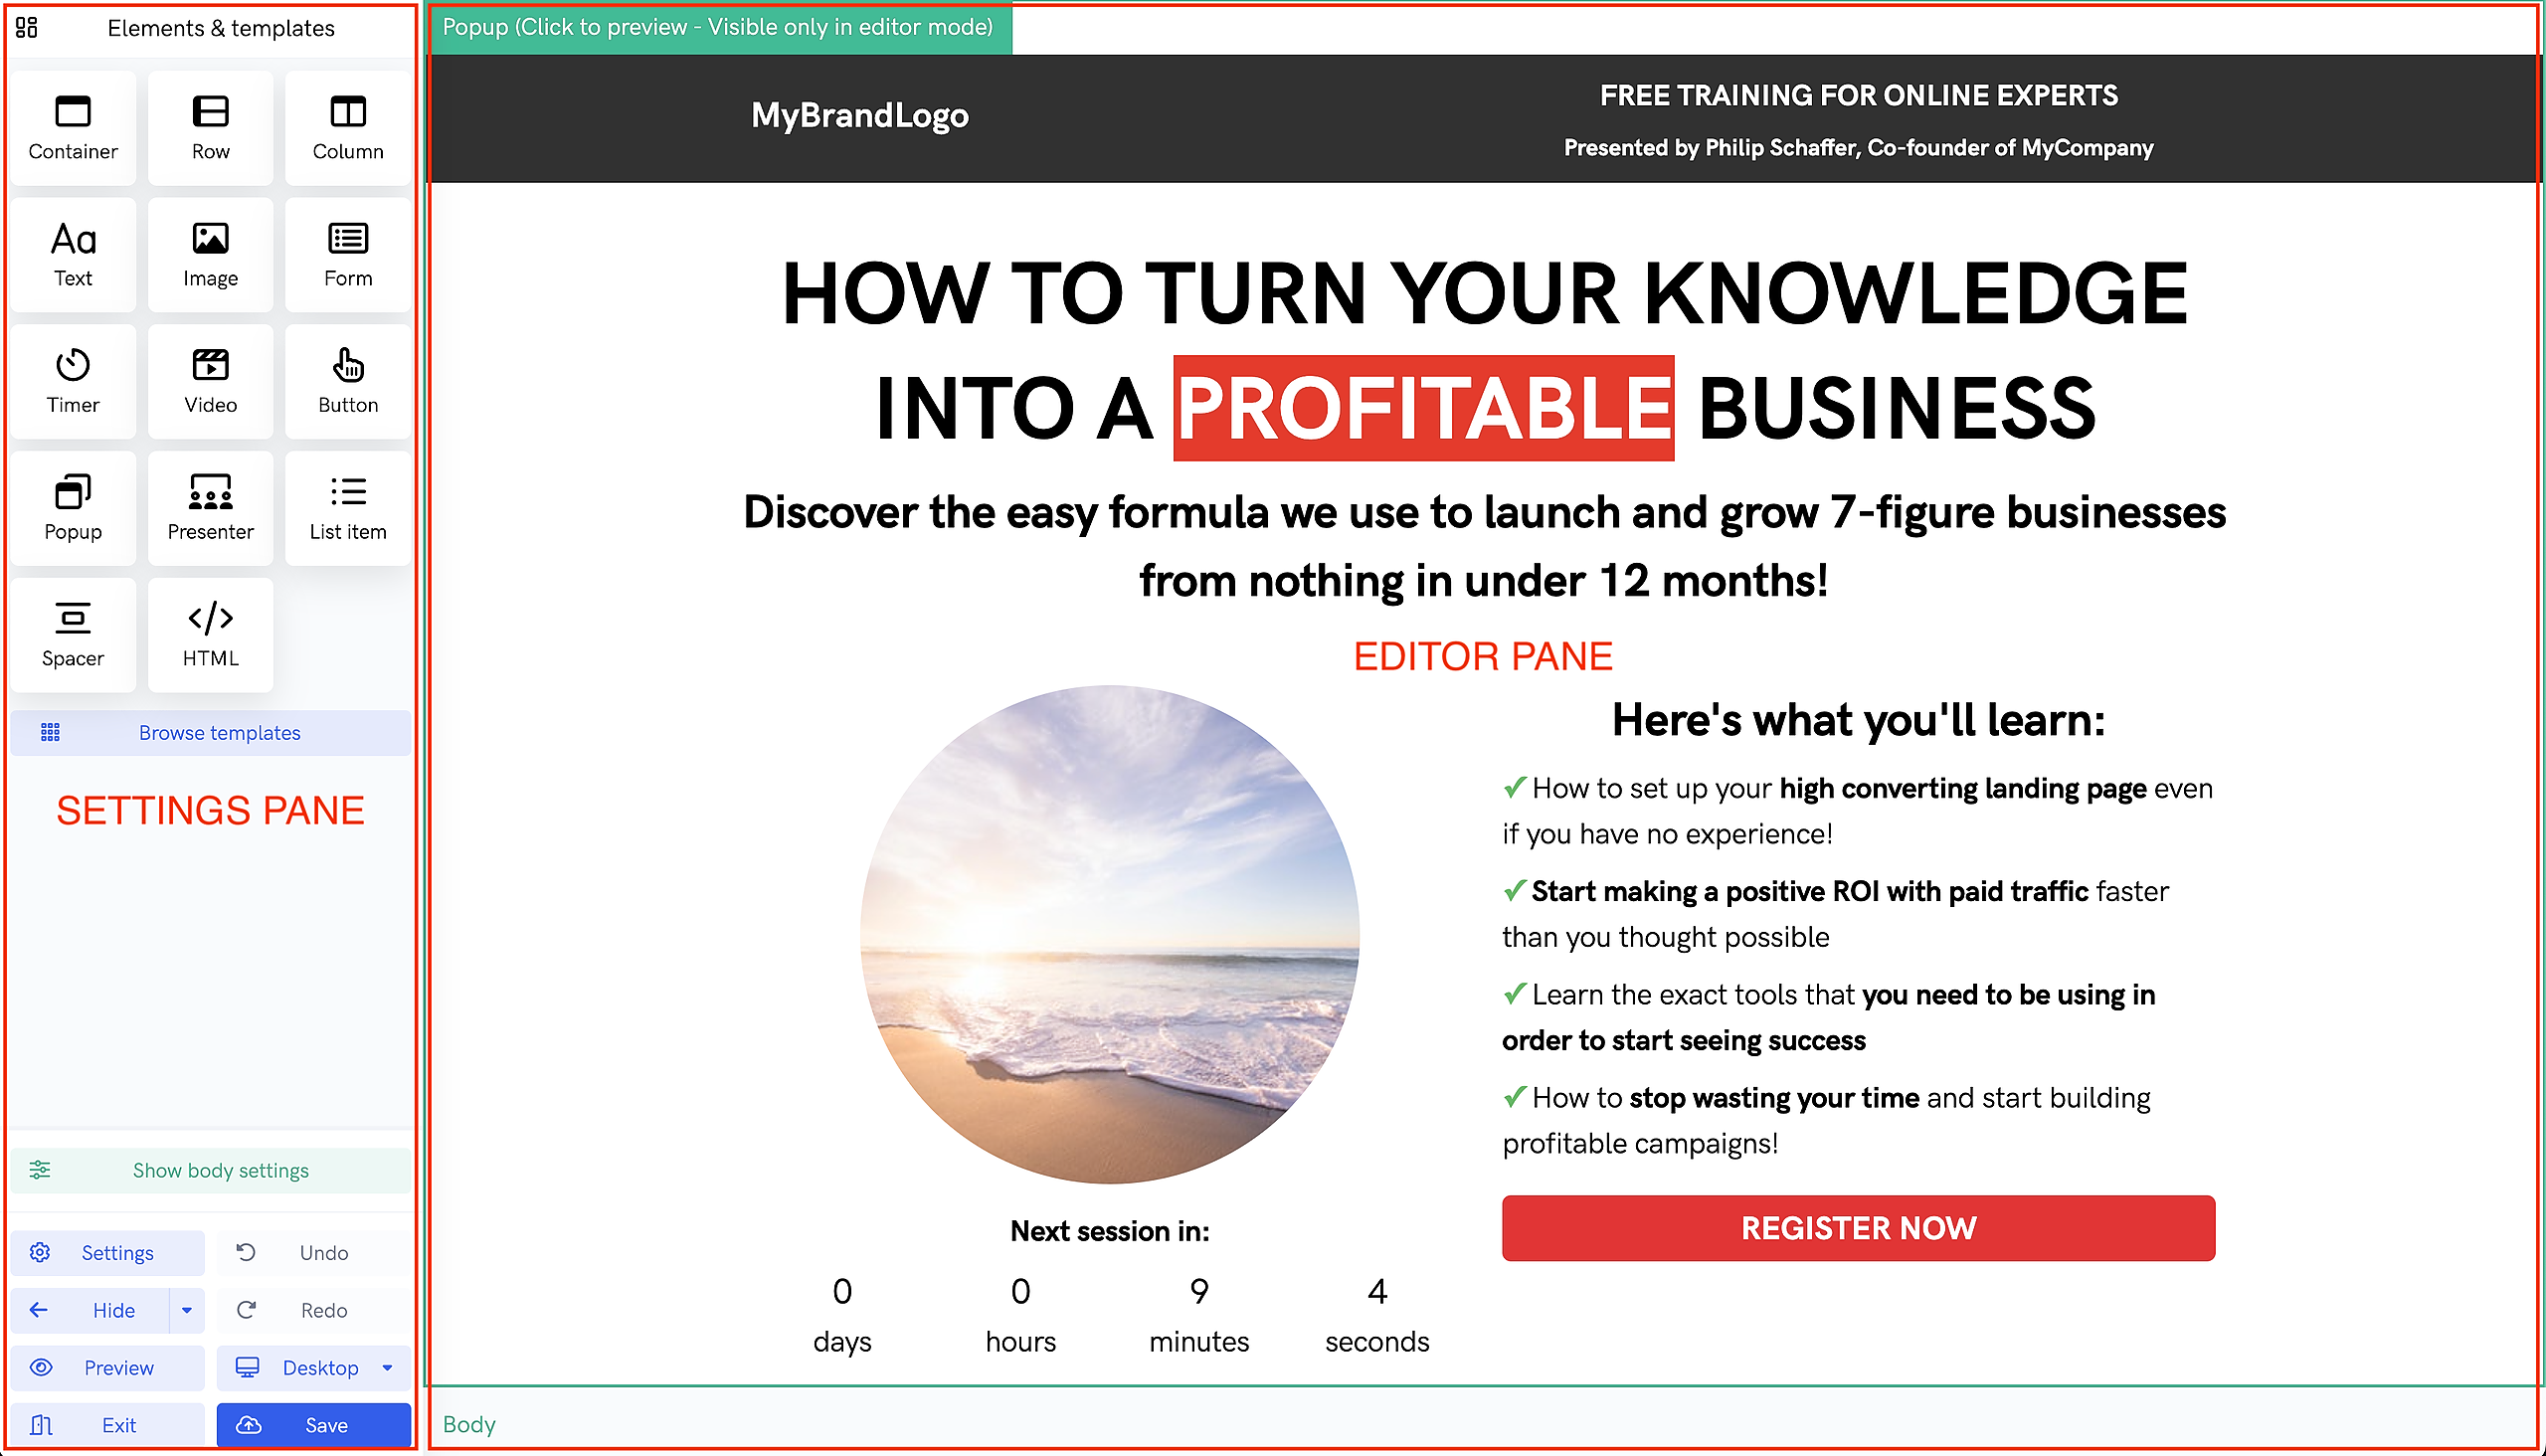
The settings & editor panes
On the left side of the page, you have your settings pane. This is where you'll be able to drag and drop new elements onto your page, view page templates, edit page & element settings, save your changes, and more. On the right is the editor pane where you can actually see a live preview of your page.
Highlighting & selecting elements
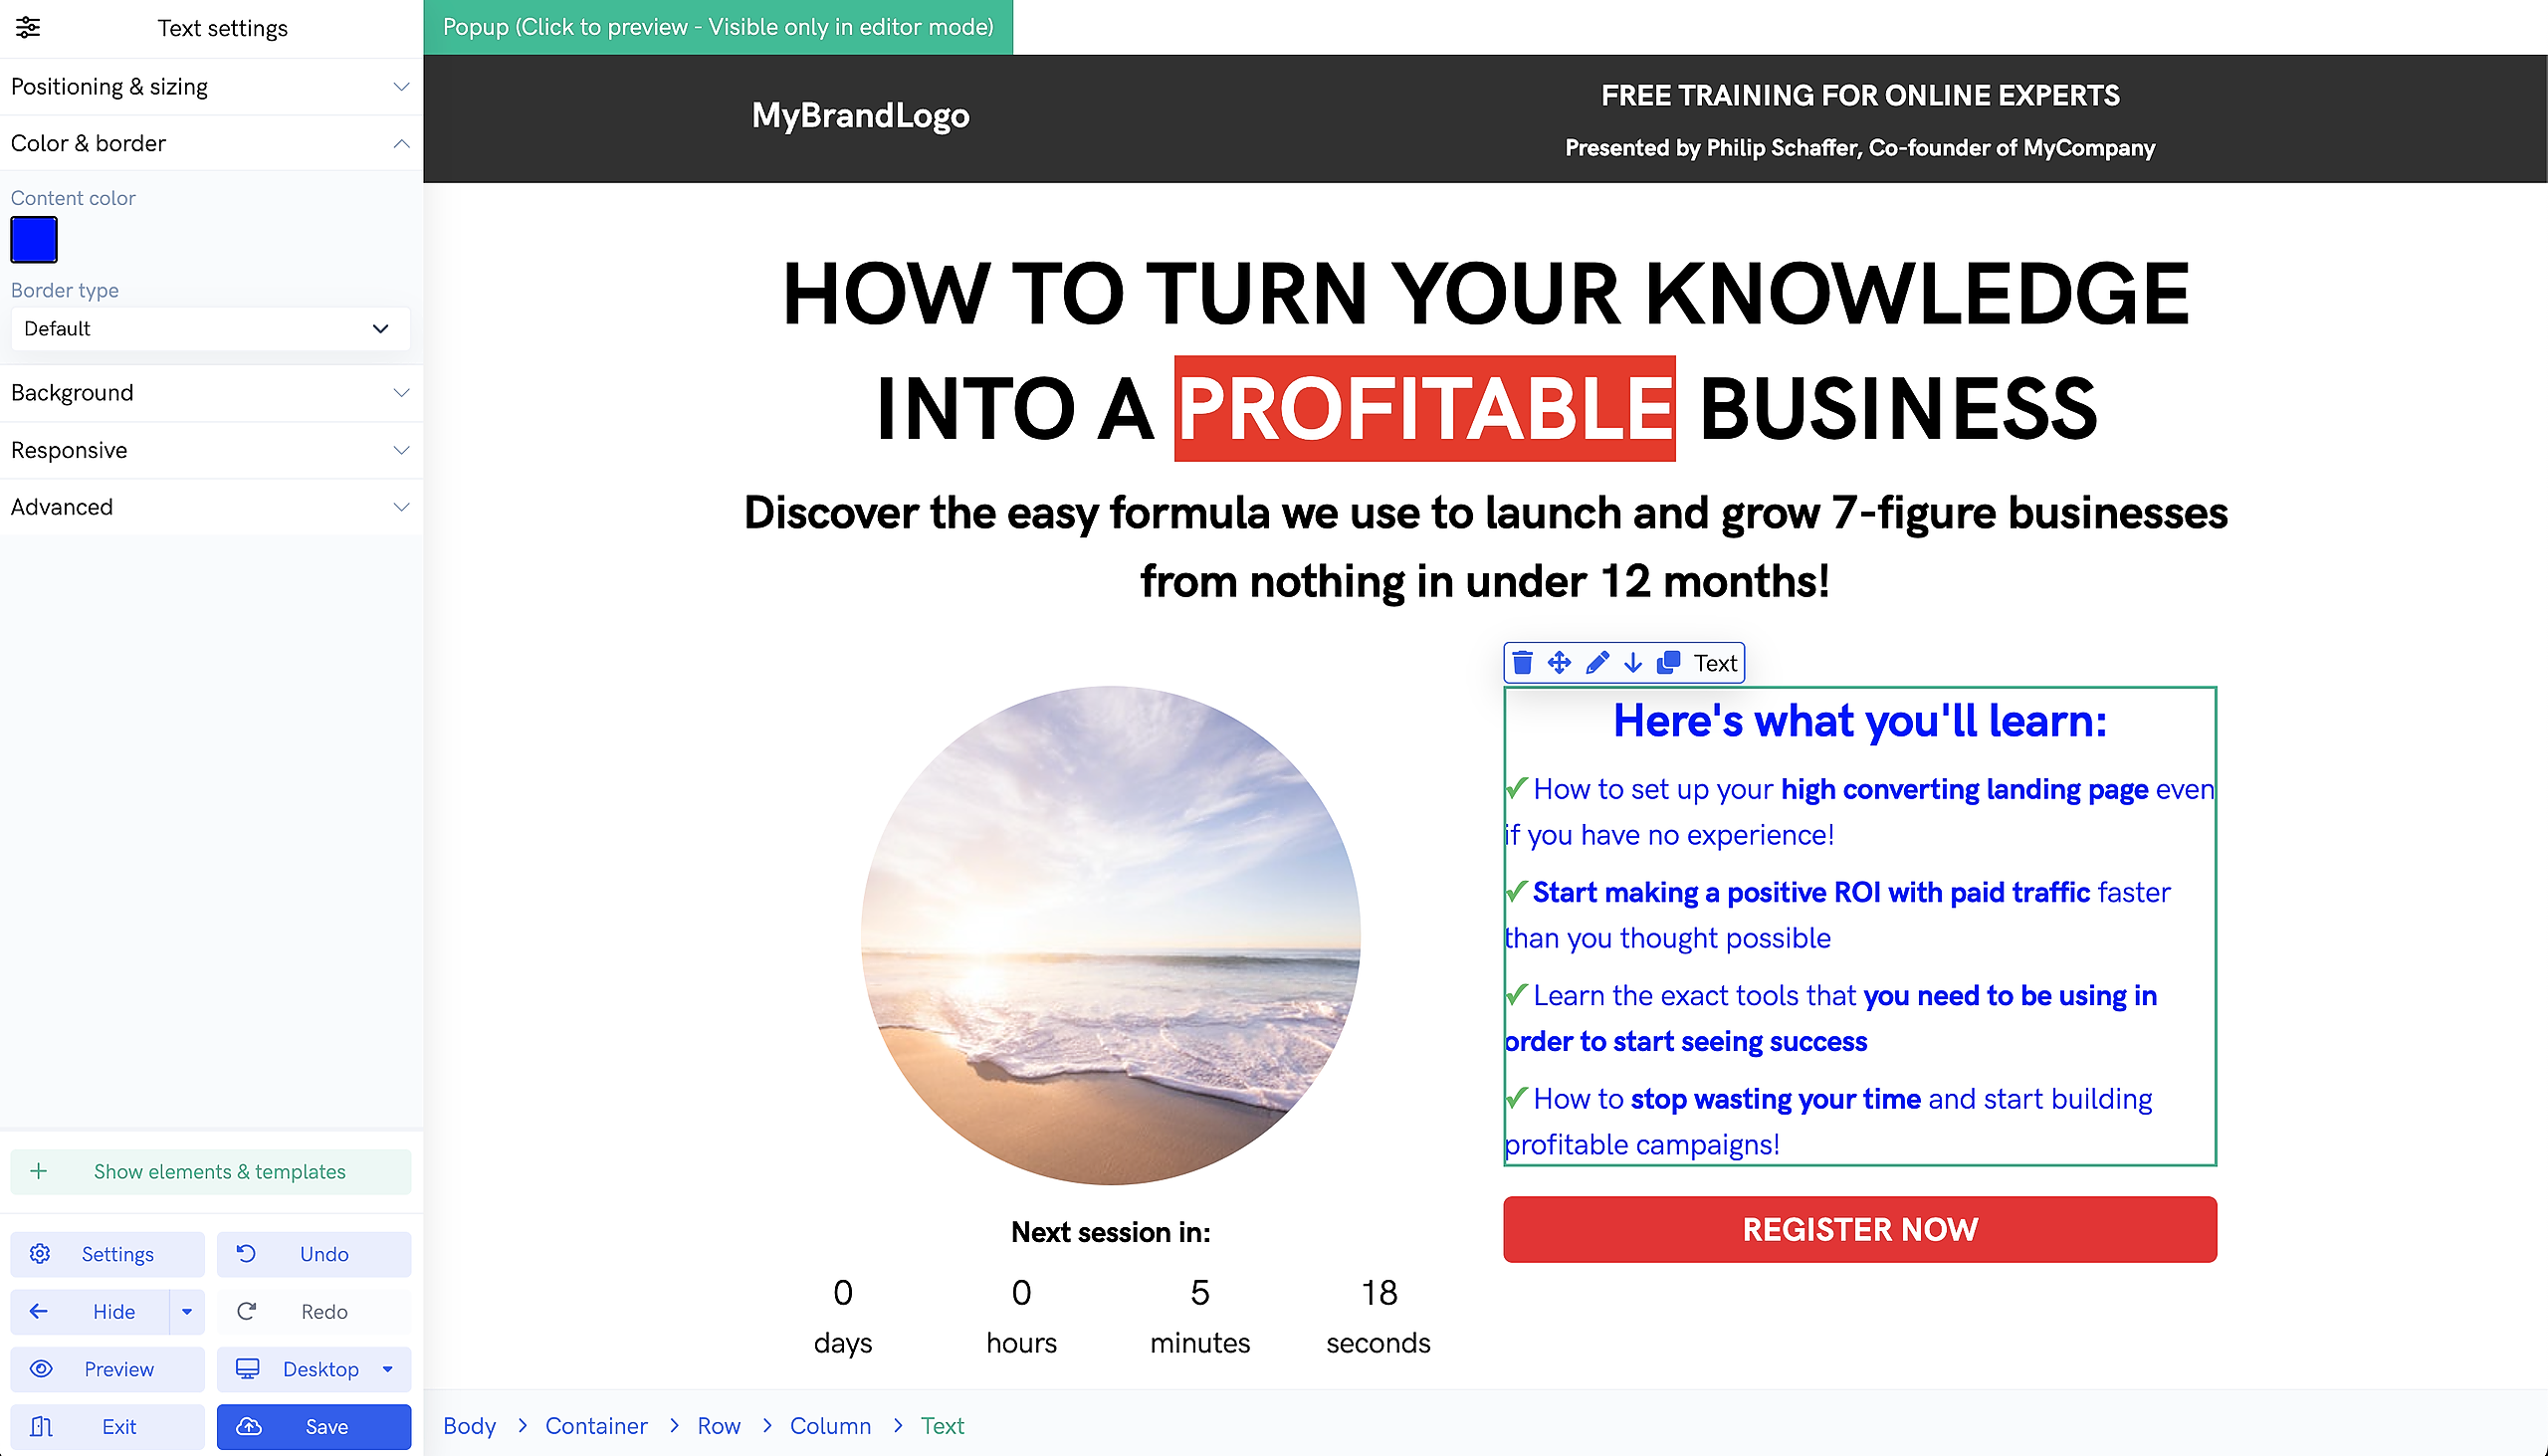
In the editor pane, you can hover over and click on any element to view and edit it's settings. For example, in the screenshot below, you'll see we've clicked on a text element. After clicking on an element, you'll notice that the settings pane on the right shows the various settings that you can tweak for that element. In the screenshot below, we've gone ahead and changed the element's color to blue.
Element actions
In the screenshot below, you'll notice the little element popover highlighted in red. Depending on the element, this popover will show different actions that you can take on the selected element. For example, you can click the trash can button to delete the selected element, drag the cross button to drag & drop the element onto a different part of the page, click the copy button to duplicate the element, etc...

Dragging & dropping elements
When dragging a new element onto your page, you'll be shown helpful popovers & outlines to indicate where you are dropping the element, as shown in the screenshot below. This can be very helpful when dragging and dropping elements throughout your page.

Undo & redo
Lastly, if you ever make a change you don't like, you can quickly and easily reverse it by using the "Undo" and "Redo" buttons at the bottom left of the builder.
Builder elements
Pages and embeds on our platform are made up of "elements" which can be customized to a great degree. Some elements, like containers, rows, and columns can even contain other elements, like text, images, and videos.
In this section, we'll go over the most important elements that you'll be working with. Remember, you can always drag & drop new elements onto your pages and embeds from the settings pane (left side of builder). And you can always view an element's settings simply by clicking on it in the editor pane (right side of builder).
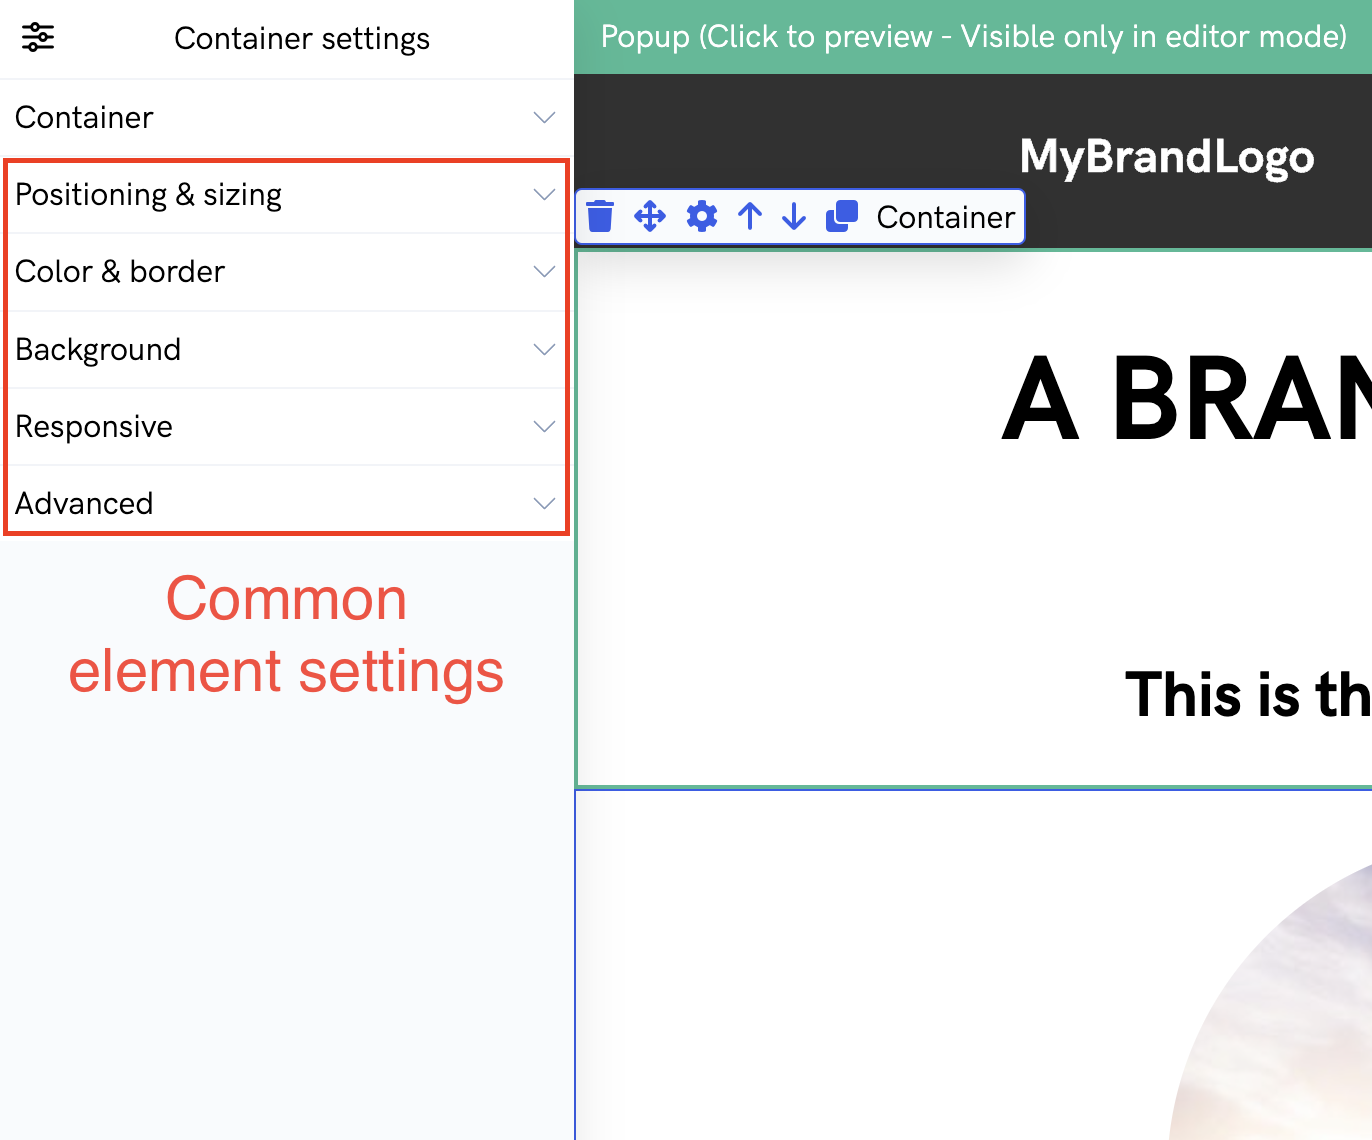
Common settings
Most elements in our page and embed builder share some common settings that you can view and tweak from the settings pane. For example, every element allows you to view and modify things like width & height, padding & margin, horizontal & vertical alignment, content & background colors, border styles, responsive options (show on desktop / hide on mobile for example) and more.
However, on top of that, most elements have some unique settings which can be edited which we'll cover below.
Text
The text element is one of the most important pieces in your pages and embeds. It's a pretty straightforward element. Simply drag and drop it anywhere on your page or embed, then double click it OR click the "pencil" icon to open up the text editor. Inside the text editor, you can modify its font type (paragraph, header, etc...), font size, text color, background color, and much more.
Image
The image element is another fairly straightforward element. Simply drag and drop it anywhere on your page or embed, then double click it OR click the "image" icon to be shown the list of images you've previously uploaded to your media library. Then select the desired image that you want to use. Image elements also have some unique settings which you can view from the settings pane like "Image fit" and "Image shape".
For example, you select a circle shape for your image element. You can also chose between "Cover" and "Contain" for the "Image fit" setting. "Contain" will ensure that your entire image is visible but it may look small depending on the element's settings. "Cover" will ensure the entire image element is "filled" but some clipping may occur.
Video
This is another important element on your pages. After dropping a video onto your page, you can edit the video's source. In the video source pop-up, you can choose a link to a video hosted elsewhere, a video you've uploaded to our platform, or even a live webinar recording from your account!
Container
These elements can only be placed at the "root" of your pages and and they can only contain "row" elements. You can think of these elements like page sections. One very useful and handy feature about containers is that you can enable them be full width. This allows you to easily set full width backgrounds on various sections of your pages.
Row
A "Row" element's job is essentially to contain "column" elements. Rows can contain multiple columns to create "horizontal" or side-by-side page content. But rows can also be placed inside columns to create further nested "horizontal" content.
Column
A "Column" element's job is to pretty much contain ALL the other elements like text, images, videos, lists, spacers, etc...
Columns can be placed horizontally next to other columns inside a row and you can tweak the size of each column to take up a specific amount of space! And as mentioned above, columns can even contain other rows which can then contain more columns to create more side-by-side content within.
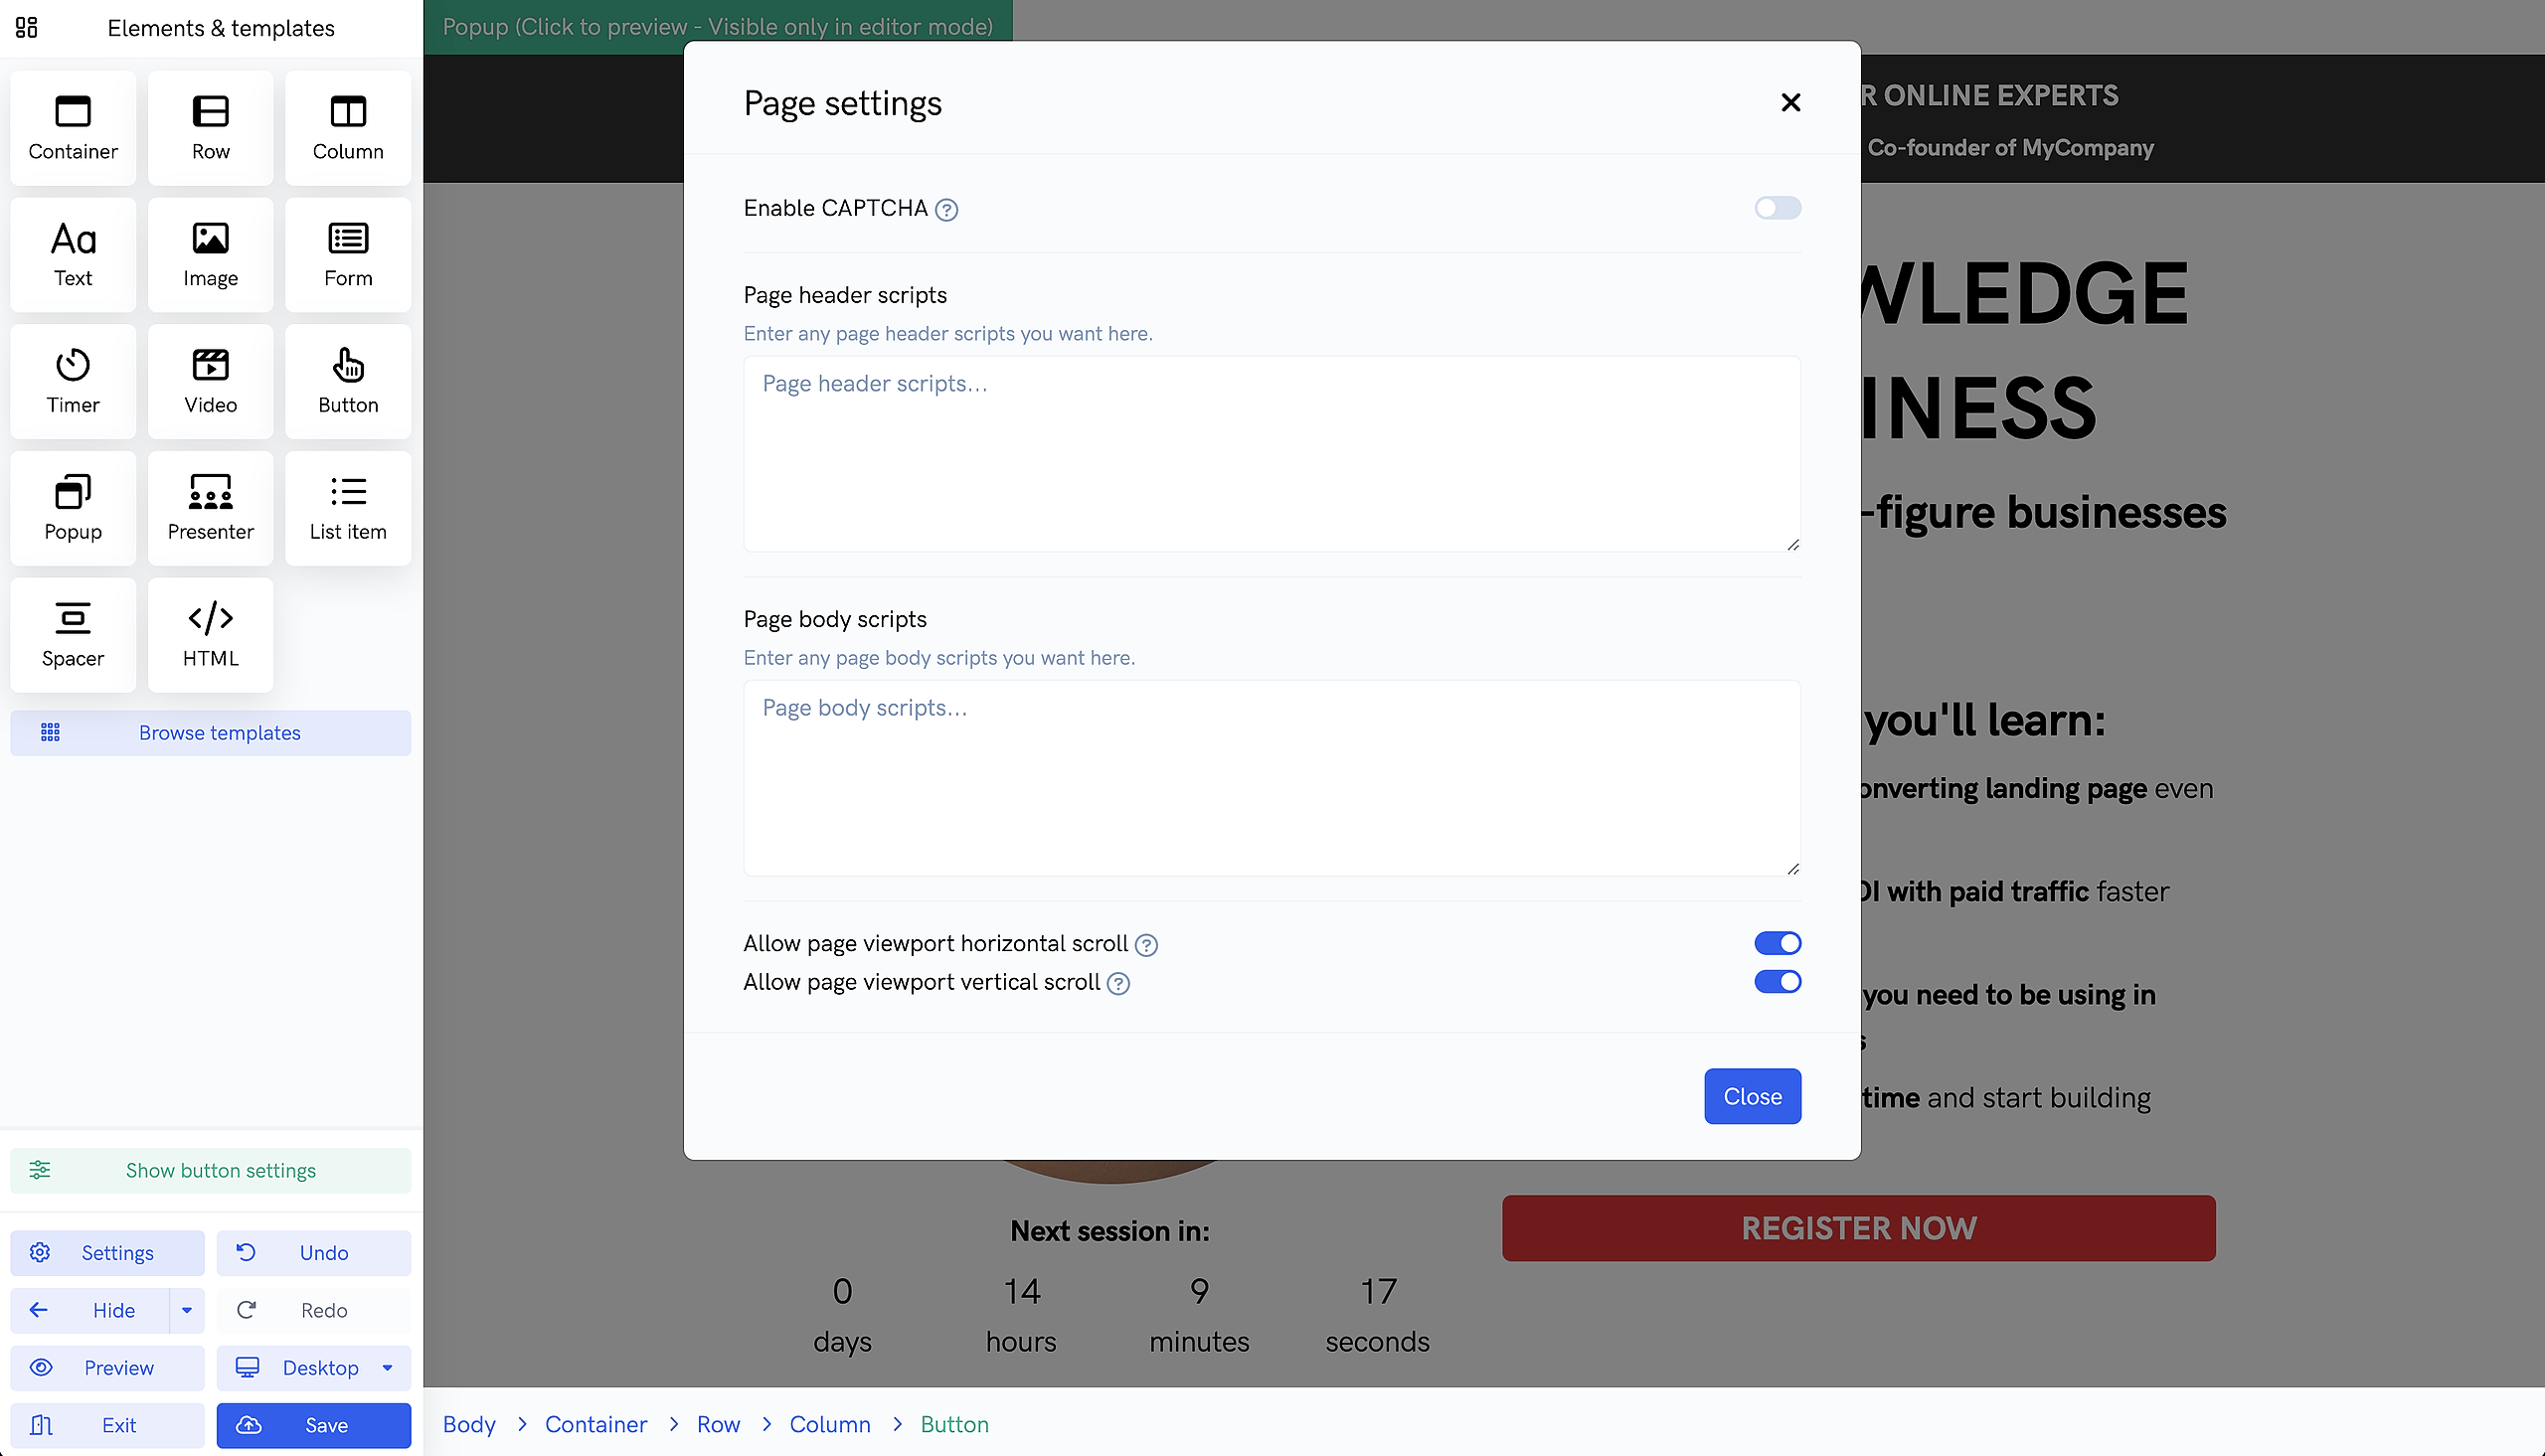
Settings
By clicking on Settings button in the lower left of the builder, you'll open a popup where you can add header and body scripts for things like tracking pixels and other custom code, enable CAPTCHA for registrations (on registration pages), and toggle vertical and horizontal scrolling on the page.