If you're a WebinarKit White Label user, you'll probably want to create, update, or delete subaccounts for you clients, customers, or employees fairly often. While you can easily do this process manually from the "Subaccounts" page in your main account, you may want to automate this process to save time.
For example, you may want to automatically create a WebinarKit subaccount whenever a customer purchases something from you using PayPal, Stripe, or your preferred payment platform.
Thanks to our Zapier apps (The "WebinarKit" Zapier app or the unbranded "Webinar Connecter" Zapier app), you can do this easily.
If you're worried about maintaining your own branding and hiding the WebinarKit brand, we've got you covered. Simply use the unbranded "Webinar Connecter" Zapier app. It has the exact same functionality as our regular "WebinarKit" Zapier app, but completely replaces all mentions of WebinarKit with the generic "Webinar Connecter" name.
You can also direct all your clients, customers, and employees to use the "Webinar Connecter" Zapier app for all their Zapier needs and use cases. That way your branding is maintained at all times and there is no mention of WebinarKit anywhere.
Regardless of whether you choose to use the unbranded "Webinar Connecter" Zapier app or our regular "WebinarKit" Zapier app, it's easy to automate your subaccount management. Just follow the steps below:
-
When setting up your Zap, select either the "WebinarKit" or "Webinar Connecter" app depending on which option you want/prefer.
-
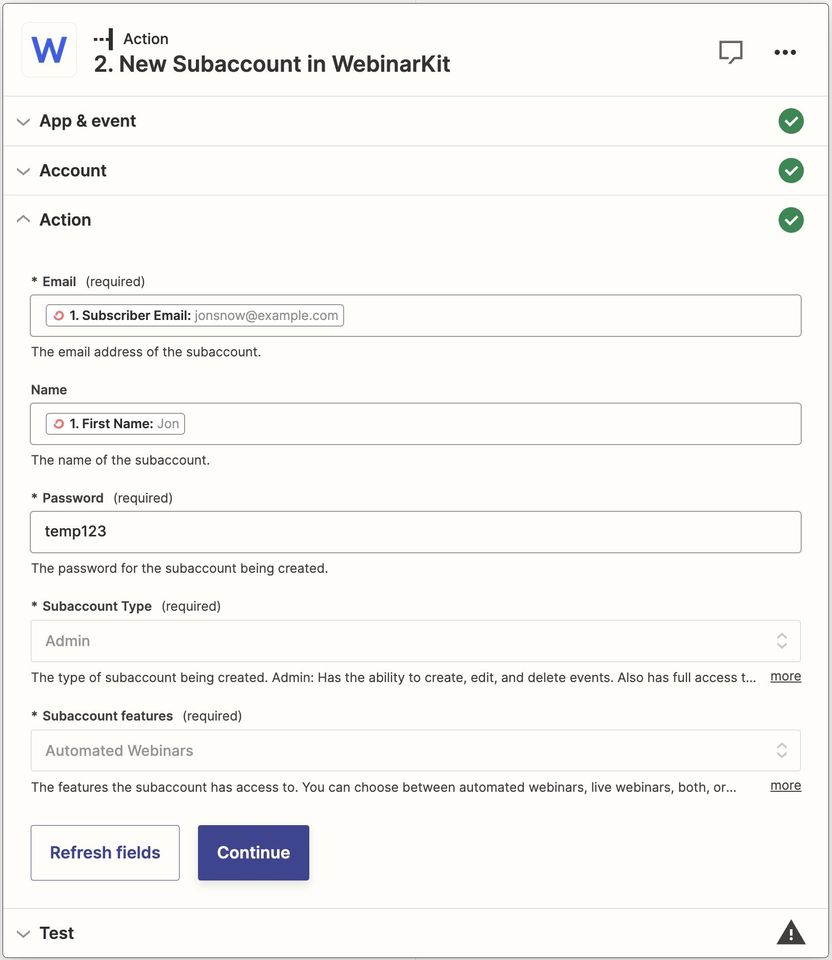
Then choose the subaccount action that you want to happen whenever your trigger occurs (create a new subaccount, update a subaccount, get a subaccount's details, or delete a subaccount).
-
Fill out the action details like the email address (required), name, password, subaccount type (admin, editor, analyst, or moderator), and subaccount features (automated webinars, live webinars, both, or none).
- Save (and optionally test) your Zap. And that's it!
Quick tip: You can disable subaccounts by selecting the "None" option from the "subaccount features" dropdown when creating/updating subaccounts. This is useful for automatically disabling subaccounts that are delinquent in payment.