
Please note: This is an advanced topic. If you are not sure what URL or UTM parameters are, then you probably don't need to worry about any information inside this article.
What are URL parameters?
URL parameters (sometimes referred to as query strings) are text elements added to the end of a link (URL). These text elements generally consist of a "key" and a "value". Below you'll see a simple example of a link with URL parameters added on:
https://example.com/mypage?traffic_source=google&another_key=another_value
The bold text is where the URL parameters start. In the above example, there are two key value pairs. One with the key "traffic_source" and the value "google". And the other with the key "another_key" and the value "another_value".
Essentially, you can use URL parameters to add extra data onto a link. Because of this, URL parameters are often used for analytics and tracking.
A common use case for why you would want to use URL parameters with WebinarKit would be to track the traffic source of your event registrants. Say you're running ads on Facebook and Google for your event and you want to see which registrants are coming from Facebook and which are coming from Google.
When setting up your ads, you could add "traffic_source=google" to your Google ads link and traffic_source=facebook" to your Facebook ads.
Then whenever someone registers for your event, our system will store the URL parameters for that registrant. You could then view the URL parameters for each individual registrant, either in our built-in analytics or by exporting them to your own CRM/email platform, and see whether the registrant came from Google or Facebook.
This is just one example but you can use URL parameters to add all sorts of analytics & tracking data to your links.
What are UTM parameters?
UTM parameters refer to 5 specific URL parameters that are commonly used in many analytics platforms. You can see them all below:
utm_source - Example: utm_source=google
utm_medium - Example: utm_medium=cpc
utm_campaign - Example: utm_campaign=spring_sale
utm_term - Example: utm_term=running+shoes
utm_content - Example: utm_content=textlink
How to pass in URL & UTM parameters to WebinarKit?
When someone registers for your event (either on a registration page hosted on our platform or via an embedded form on your own website/custom landing page), WebinarKit will store any URL parameters at the webpage the registrant is currently on.
So pretty much any URL/UTM parameters you add to your registration link will be stored along with the usual registration data (email, first name, last name, etc...).
How to view and retrieve URL & UTM parameters for my registrants?
The easiest way to view the URL parameters of your registrants is to open your event's analytics page and look at the "URL parameters" column. This data is also exported to the .csv file that is downloaded when you click the "Export Registrants" button.
If you'd like to send the URL parameters to a 3rd party application or CRM, currently we support 2 methods of doing this: Zapier and Webhooks. If you're using HighLevel, you can use their "inbound webhooks" feature to receive WebinarKit's webhook data. See the webhook section below for an example of that.
Zapier
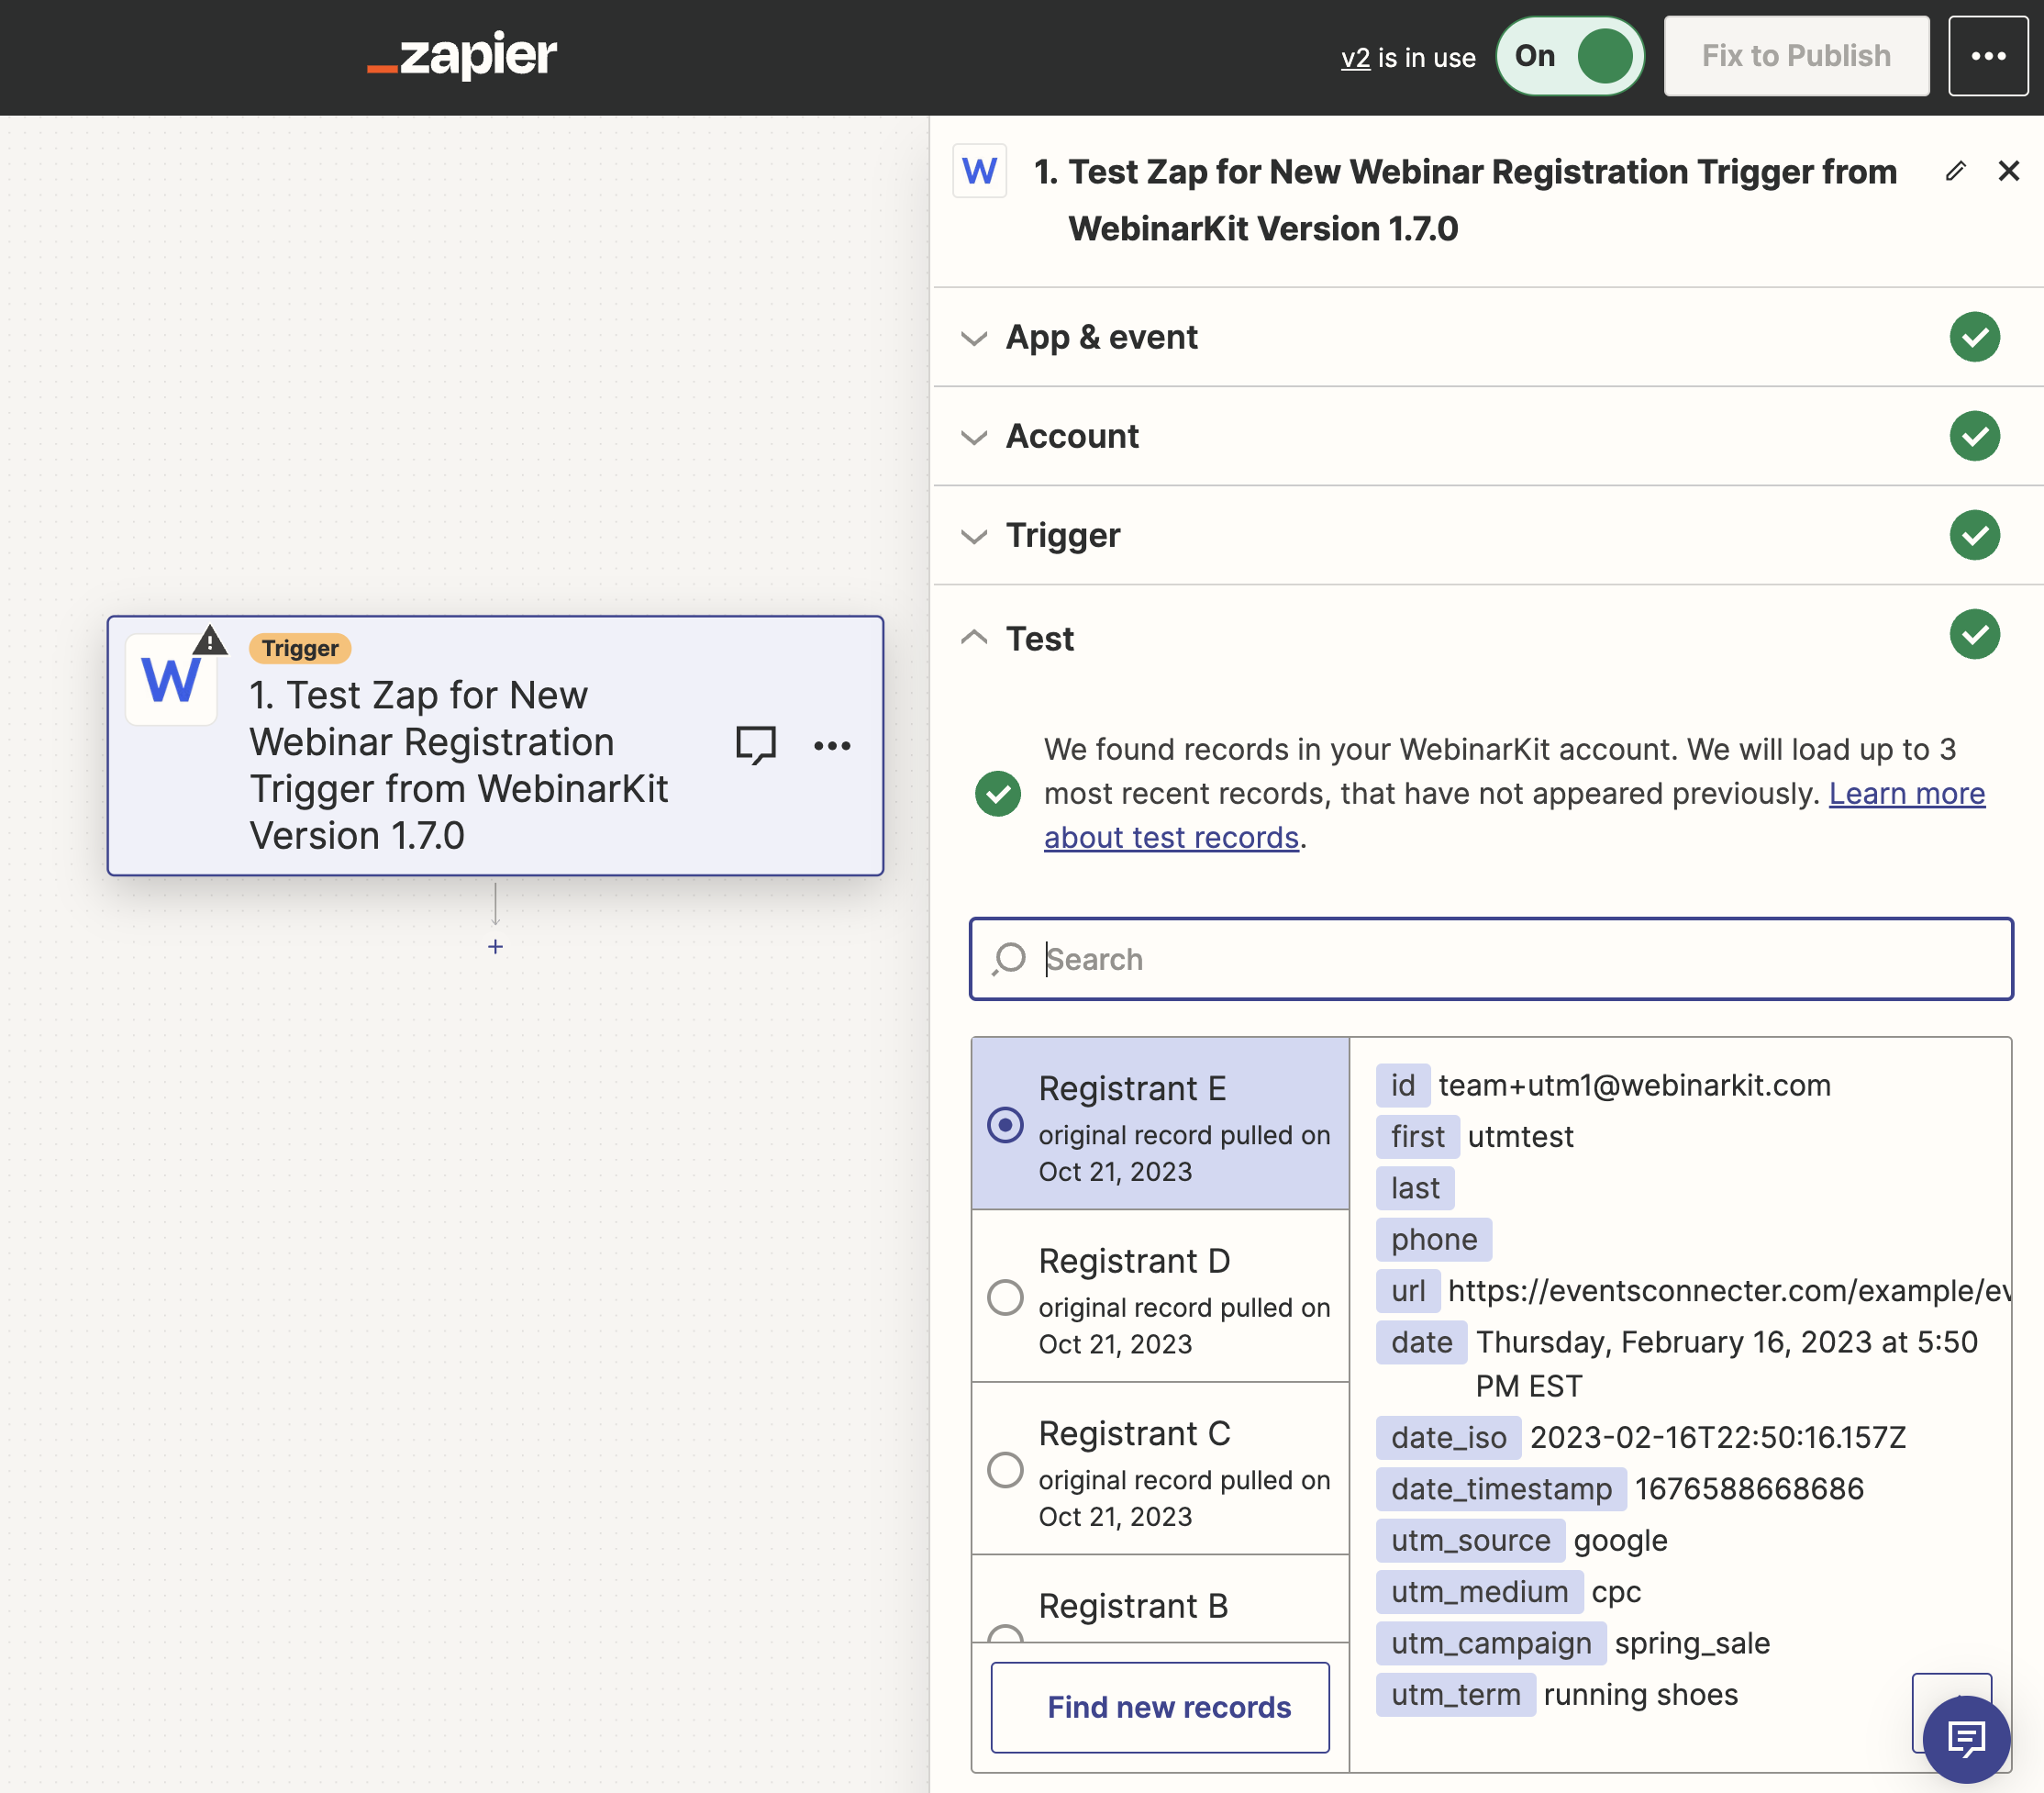
You can use our Zapier apps (WebinarKit OR Events Connecter for White Label users) to pass along a registrant's URL parameters. Our Zapier integration makes it easy to grab each individual value from the URL parameters passed in. See the screenshot below to see an example of UTM parameters being passed from an event registrant.
Webhooks
You can also set up a webhook ( see our article on webhooks here ) to send registrant data, including URL parameters, to a destination of your choosing. Similar to our Zapier integration, you can individually grab each key value pair from the URL parameters via the webhook request payload.
It's also worth noting that if you are a HighLevel user, you can use their "inbound webhook" feature to receive the WebinarKit webhook data fairly easily. In the following example, we show an example workflow that runs when an event registration occurs.

First, we create a HighLevel Workflow and set it to trigger on an "inbound webhook".
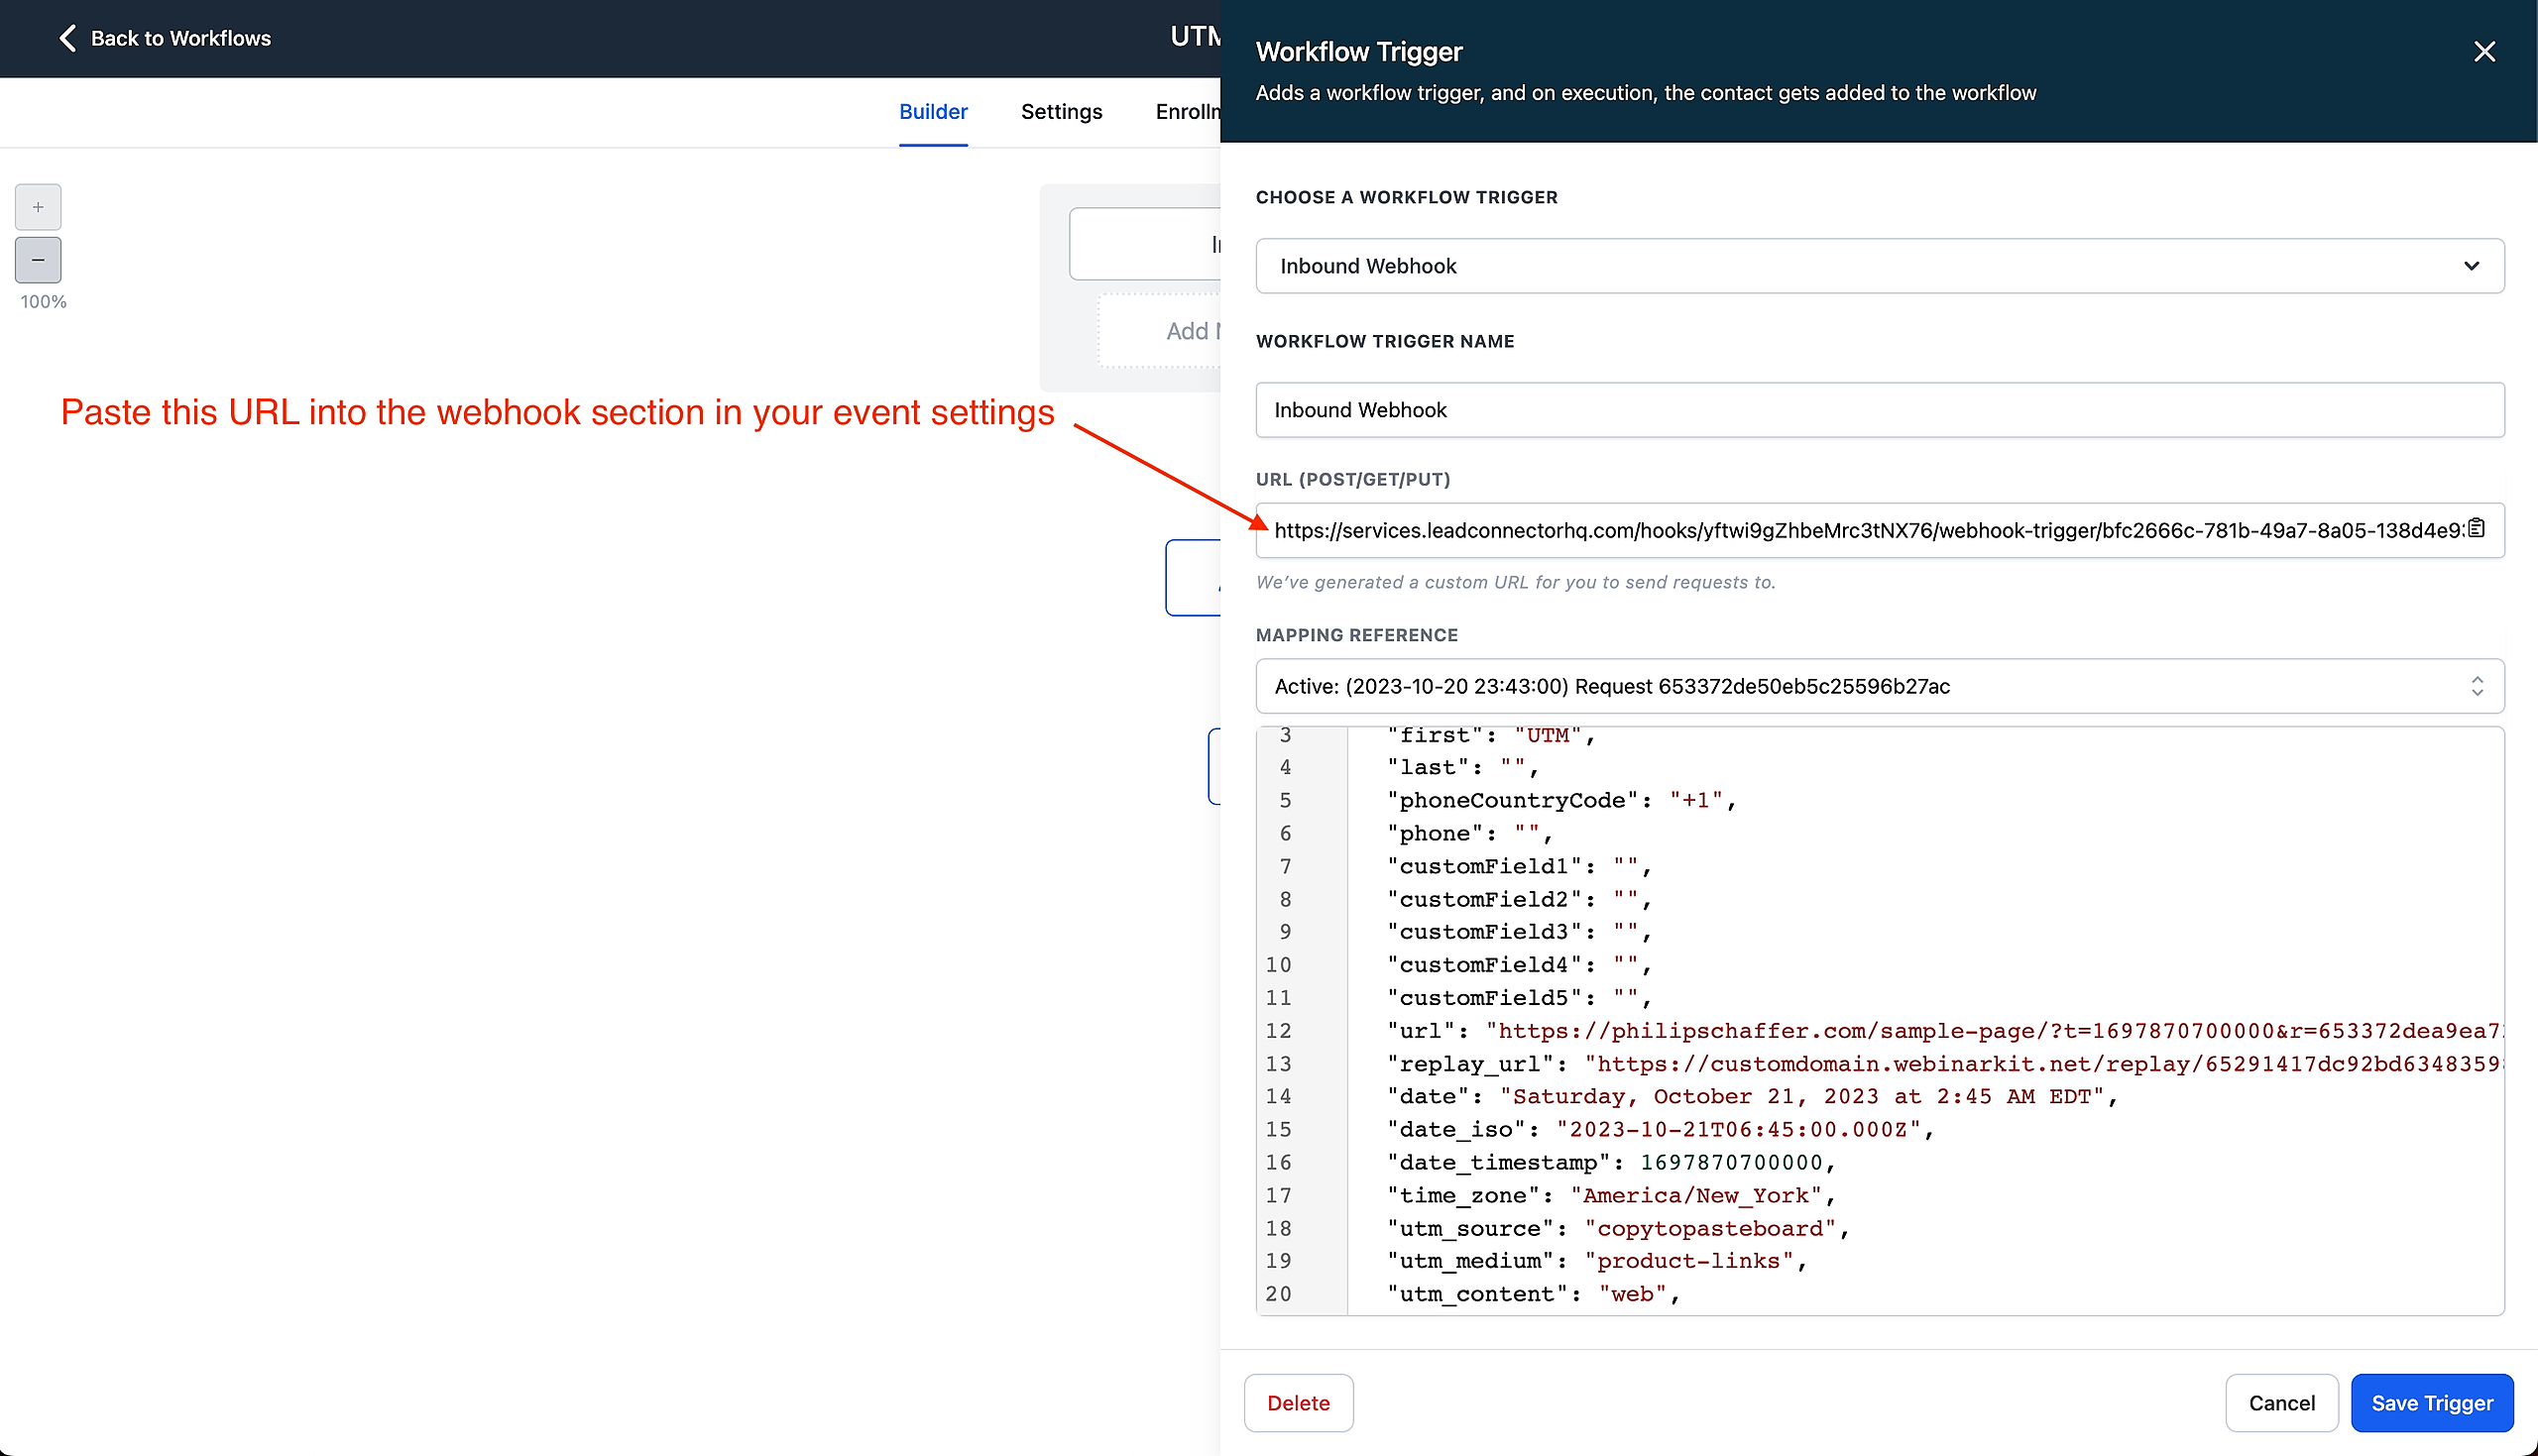
Then we grab the webhook URL provided by HighLevel and paste that into our event settings in WebinarKit (under the webhook section).
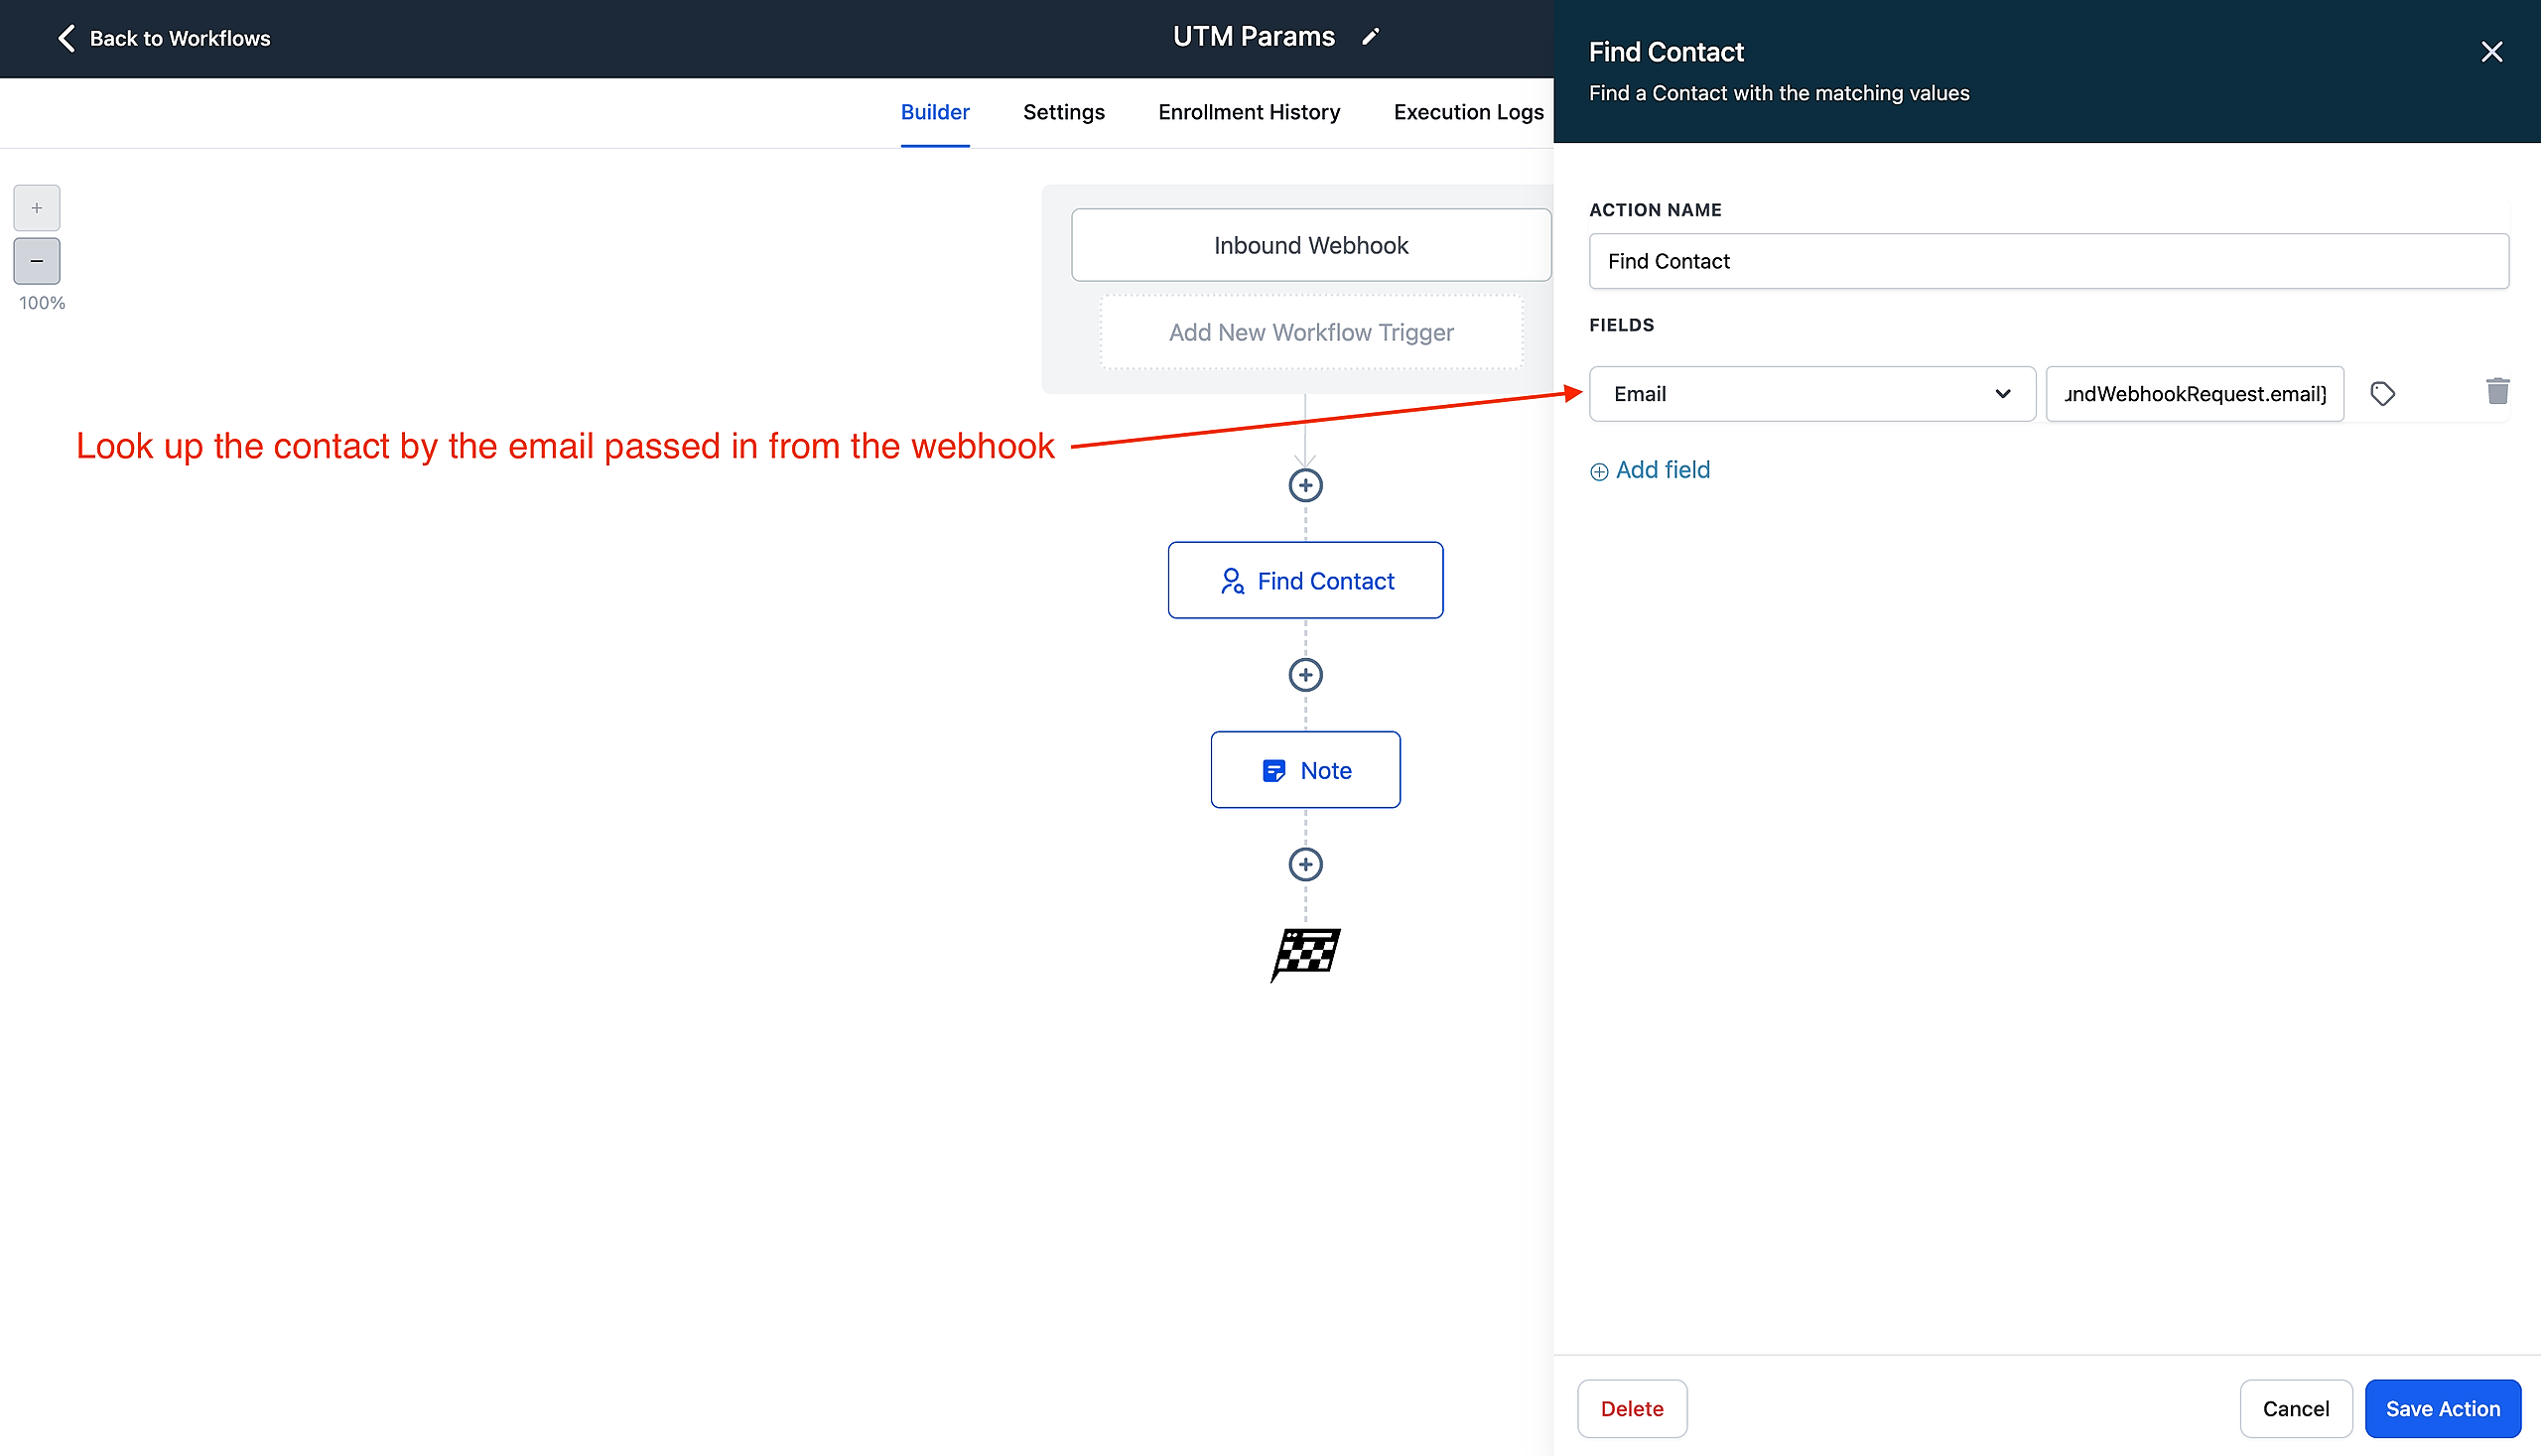
In order to update the correct contact with the URL parameters, we look up the contact we want with the email passed from the webhook.
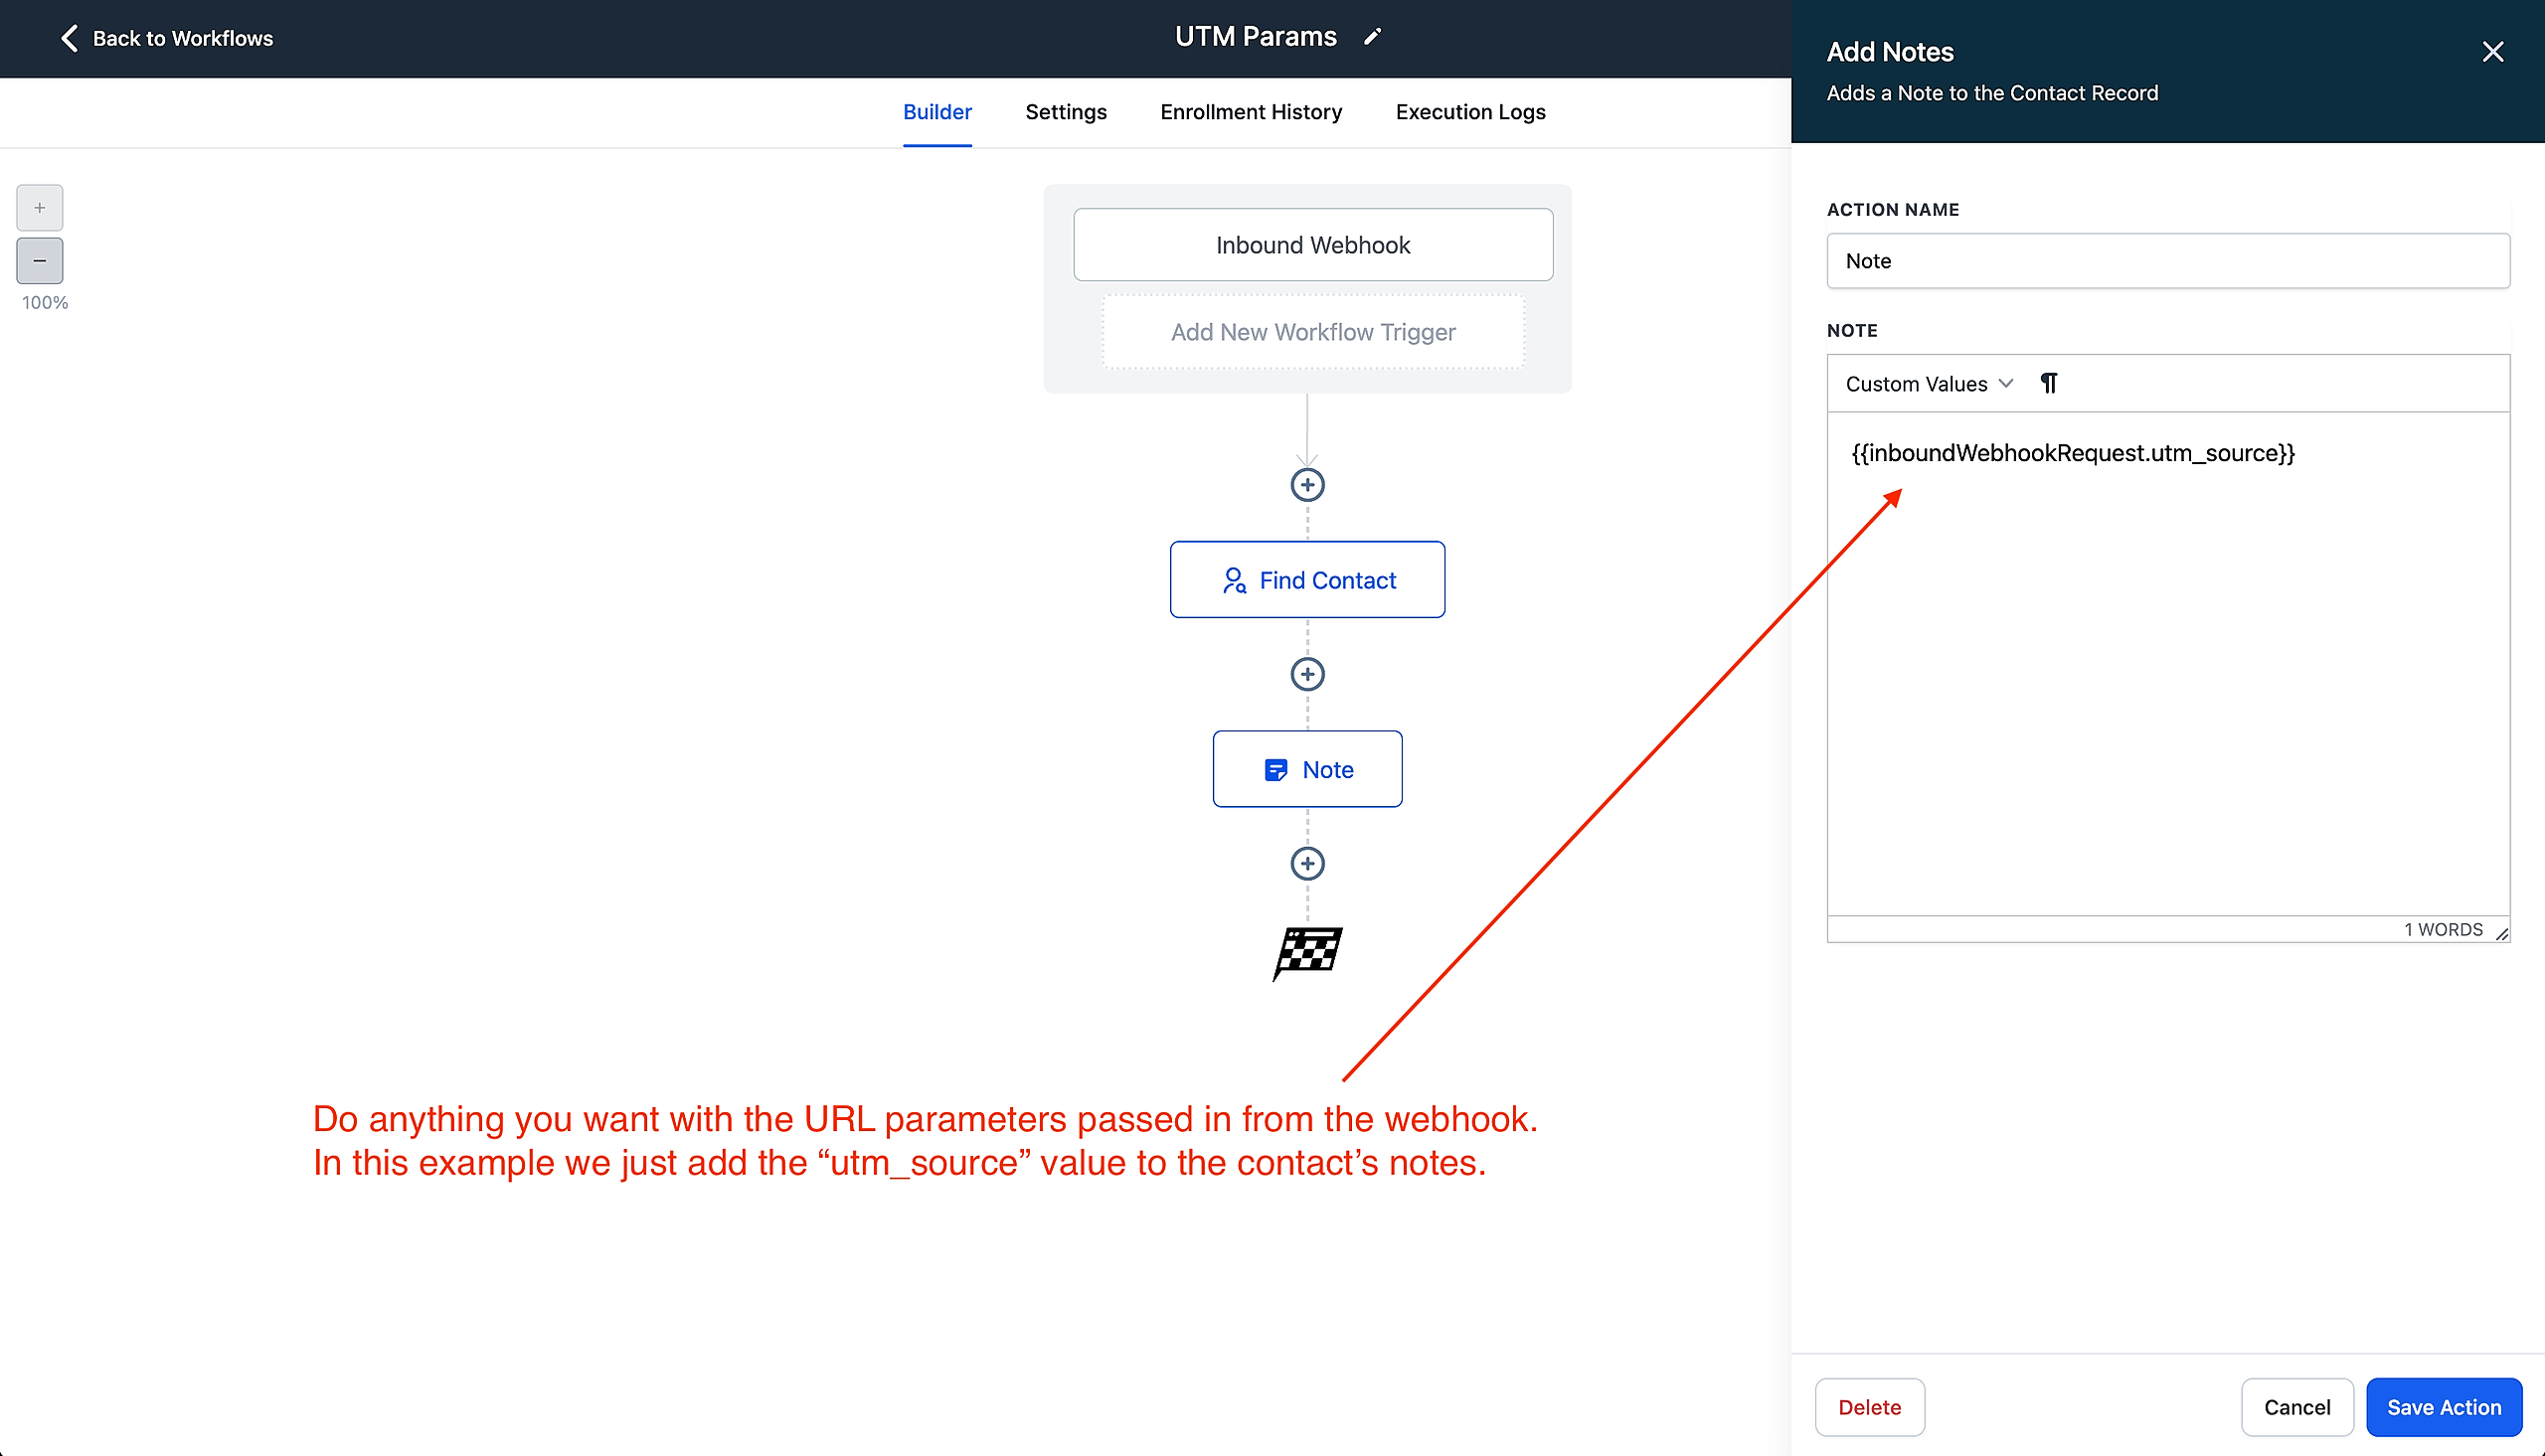
Finally, we can do anything we want with the URL parameters passed from the webhook. In this example, we simply add the "utm_source" value to the contact's notes.